Making Paczki for Fat Tuesday

Raspberry preserves, Lemon Curd, and Vanilla Custard filled Paczki

Raspberry preserves, Lemon Curd, and Vanilla Custard filled Paczki

Last year we started a new family tradition—making Paczki for Fat Tuesday! For those of you unfamiliar with this tradition, historically, Polish Catholics, the day or week before Lent begins, indulge in these rich donuts made with a sweet egg & milk dough and filled with custard and jam. Happily, this has become an American tradition throughout the US. Though while I grew up in Cleveland, Ohio which has a very large Polish population, I don’t recall eating Paczki before I moved to Michigan (but Brock tells me otherwise). For history buffs, here’s a little background via Michigan.org.

Our local grocery stores start selling them weeks before Lent. They’re fine, but I knew that homemade would be a fun project and more authentic than what we can find in our small town. After scouring the internet for a good recipe, I landed on this one from Serious Eats. I appreciate that they recreated donuts from the US Paczki capital, Hamtramck, MI, where Fat Tuesday is called “Paczki Day” and local Polish bakeries have lines out the door selling these sweet, dense filled donuts.

Below is an adaptation of the Serious Eats recipe. Having never made donuts before, I worried that it would be complicated. And what I found it that the process is more time consuming than complicated because there are three different rise times (for the yeast starter, for the dough, and then for the donuts before you fry them). This is a great team or family project. It’s nice to have someone frying, rolling in powdered sugar and filling the paczki. Bottom line—it’s definitely takes some time, but, they are so worth it! Store bought can’t compare with homemade. Note: I do think they are best eaten within 48 hours, and are truly amazing the first day.

We filled the Paczki with three different types of filling. My homemade raspberry preserves, a basic custard filling (I went with a pretty simple custard made from cornstarch. It’s good and not nearly as time consuming as making custard from egg yolks), and a lemon curd that I had on hand from Trader Joe’s. I have also made my own lemon custard and lemon preserves which is great if you have the time.

Paczki Dough Recipe (adapted from Serious Eats)

Ingredients:

2 cups whole milk (pretty sure I only had 2% so I substituted a 1/2 c. of half/half)

4 1/2 teaspoons instant yeast (2 standard sized envelopes)

1/2 cup plus 1 tablespoon sugar

5 cups all purpose flour

4 egg yolks plus one whole egg

1 teaspoon salt

1 teaspoon vanilla extract

1/4 cup unsalted butter, melted

2 quarts canola oil for frying

1 1/2 cups favorite custard or preserves (I used a mix of raspberry preserves, vanilla custard, and lemon curd)

1 cup powdered sugar for dusting

Step 1:   

  • Heat 2 c. whole milk to 110-115 degree and dissolve yeast in milk

  • Add 1 TBSP Sugar & 2 Cups of Flour

  • Mix until consistency of pancake batter 

  • Cover and let rise in a warm spot (30 minutes or so)

Raspberry, Lemon Curd, and Custard filled Paczki

Raspberry, Lemon Curd, and Custard filled Paczki

Step 2:       

  • Combine egg and yolks in a medium bowl

  • Whisk until light and frothy (about 4 minutes)

  • Whisk in 1/2 c of sugar, 1 tsp salt, 1 tsp vanilla 

 Step 3:        

  • Slowly stir cooled melted butter (1/4 c) into yeast starter 

  • Slowly add egg mixture until just combined

  • Fit mixer with dough hook

  • Stir in flour, 1/2 cup at a time until a soft dough comes together. 

  • Dough will be very sticky! 

  • Transfer to an oiled bowl, cover with plastic wrap and let rise for 1 hr.

Step 4:

  •  Turn out dough onto a floured surface

  • Dust surface of dough with flour & punch dough to about 1/2”

  • Cut out doughnuts with 2 or 3” biscuit cutter

  • Transfer rounds to parchment lined baking sheets 

  • Cover with a clean towel and let rise to double in size (about 30 minutes)

 Step 5.         

  •  Pour 2 quarts of canola into a dutch oven

  • Heat oil to 360 degrees (I use a candy thermometer

  • Carefully drop doughnuts in 1 at a time (approximately 3-4 at a time)

  • Cook until one side is golden brown and flip  (*Note that they continue to brown a bit as they cool)

  • Remove from oil and cool on a wire rack

 Step 6.         

  •  Toss cooled doughnuts in a shallow bowl filed with powdered sugar

  • Fill your pastry with your favorite preserves 

  • I suggest eating the first day—you can store for a few days them but they taste best within 48 hrs.

Finally, I there is video of me making the Paczki saved to my Insta stories highlight reel. And I would love to hear if you have any Fat Tuesday traditions. Please share!


Favorite Christmas Cookie Recipes

Molasses cookies—love this recipe, and I’m not usually a spice cookie fan! Photography: Rachel Cuthbert Photography

Molasses cookies—love this recipe, and I’m not usually a spice cookie fan! Photography: Rachel Cuthbert Photography

It’s December 22, and I’m finally ready to begin baking. I like to save my Christmas baking until I’ve finished all of my holiday shopping, and I’m ready to hang out in the kitchen, listen to Christmas music or play a well loved holiday movie in the background. These are some of my favorite moments right before the flurry of relatives & friends descend for Christmas. And I do have a very specific repertoire that is in my rotation: Italian knot cookies from this cookbook, lemon drop cookies, pizzelles, chocolate and vanilla biscotti, thumbprint cookies with raspberry filling & Russian teacakes are a few of my favorites!

The following molasses cookie has become a new holiday favorite. And honestly, I’ve never been a huge fan of gingerbread or spice cookies, but this molasses cookie is delicious. It’s from one of my favorite baking cookbooks, “A Collection of Mrs. R’s Old Fashioned Recipes.” Mrs. R Old Fashioned Bakery was located in Pentwater, MI, and when Mrs. R. closed shop, in 2014, she compiled some of her favorites in a spiral bound book that is unfortunately no longer in print. I did, however, get permission to publish the following recipe:

Molasses Cookies

(reprinted with permission)

Preheat oven to 350 degrees.

In a mixing bowl with a paddle attachment, combine:

  • 2 cups granulated sugar

  • 1 1/3 cups canola oil

  • 1/2 cup molasses (recipe suggests using a brand with a mild taste, but of course this is a preference. Adjust accordingly)

  • 2 eggs

  • 4 tsp. baking soda

  • 1 tsp. ground cloves

  • 1 tsp. ground ginger

  • 2 tsp. ground cinnamon

  • 1/2 tsp. salt (scant)

Mix above ingredients well in your mixer. While mixer is still turning, add:

  • 4 cups flour (one cup at a time)

When thoroughly mixed, form into balls (about the size of ping-pong balls) and roll in a small bowl of granulated sugar before placing on a greased or parchment papered cookie sheet. Leave the cookies in a ball. Do not flatten.

Bake at 350 degrees for 10-12 minutes or until the tops of the cookies begin to crack. Cool for about 5 minutes before removing from the cookie sheet onto a cooling rack. If cookies are too thick, take away a couple of tablespoons. Don’t be afraid to “tweak” your cookies to fit your preference.

Makes about 30 cookies that are 4 inches in diameter.

If you’ve followed along for any time, you know that my Italian heritage deeply influences my cooking & baking. For the holidays, I favor more traditional Italian confections. The following are a handful of links to recipes, cookbooks, & cookie inspiration:

From left to right: Lemon Drop cookies, Chocolate Almond Biscotti, Cranberry Nut Biscotti, Grandma’s Pizzelles, Italian Knot Cookies Photography: Rachel Cuthbert Photography

From left to right: Lemon Drop cookies, Chocolate Almond Biscotti, Cranberry Nut Biscotti, Grandma’s Pizzelles, Italian Knot Cookies Photography: Rachel Cuthbert Photography

What are some of your favorite holiday cookies? Please share! Wishing you a wonderful holiday as you enjoy time with your friends and fami!y. Buon Natale! Jen

Celebrating Christmas with the Family & Tree Classics

One of the joys of working with Tree Classics is their commitment to celebrating holiday and family. And gratefully, I get the opportunity to enter other people’s lives and spread a bit of Christmas cheer.  This year I asked Tree Classics if we could decorate the house of a friend of ours, Jess, for the Christmas with the Family campaign.  Recently diagnosed with breast cancer, she undergoes surgery in December.  With a husband and two little guys at home, I knew it would be a small comfort & joy to have the house prepared beforehand. 

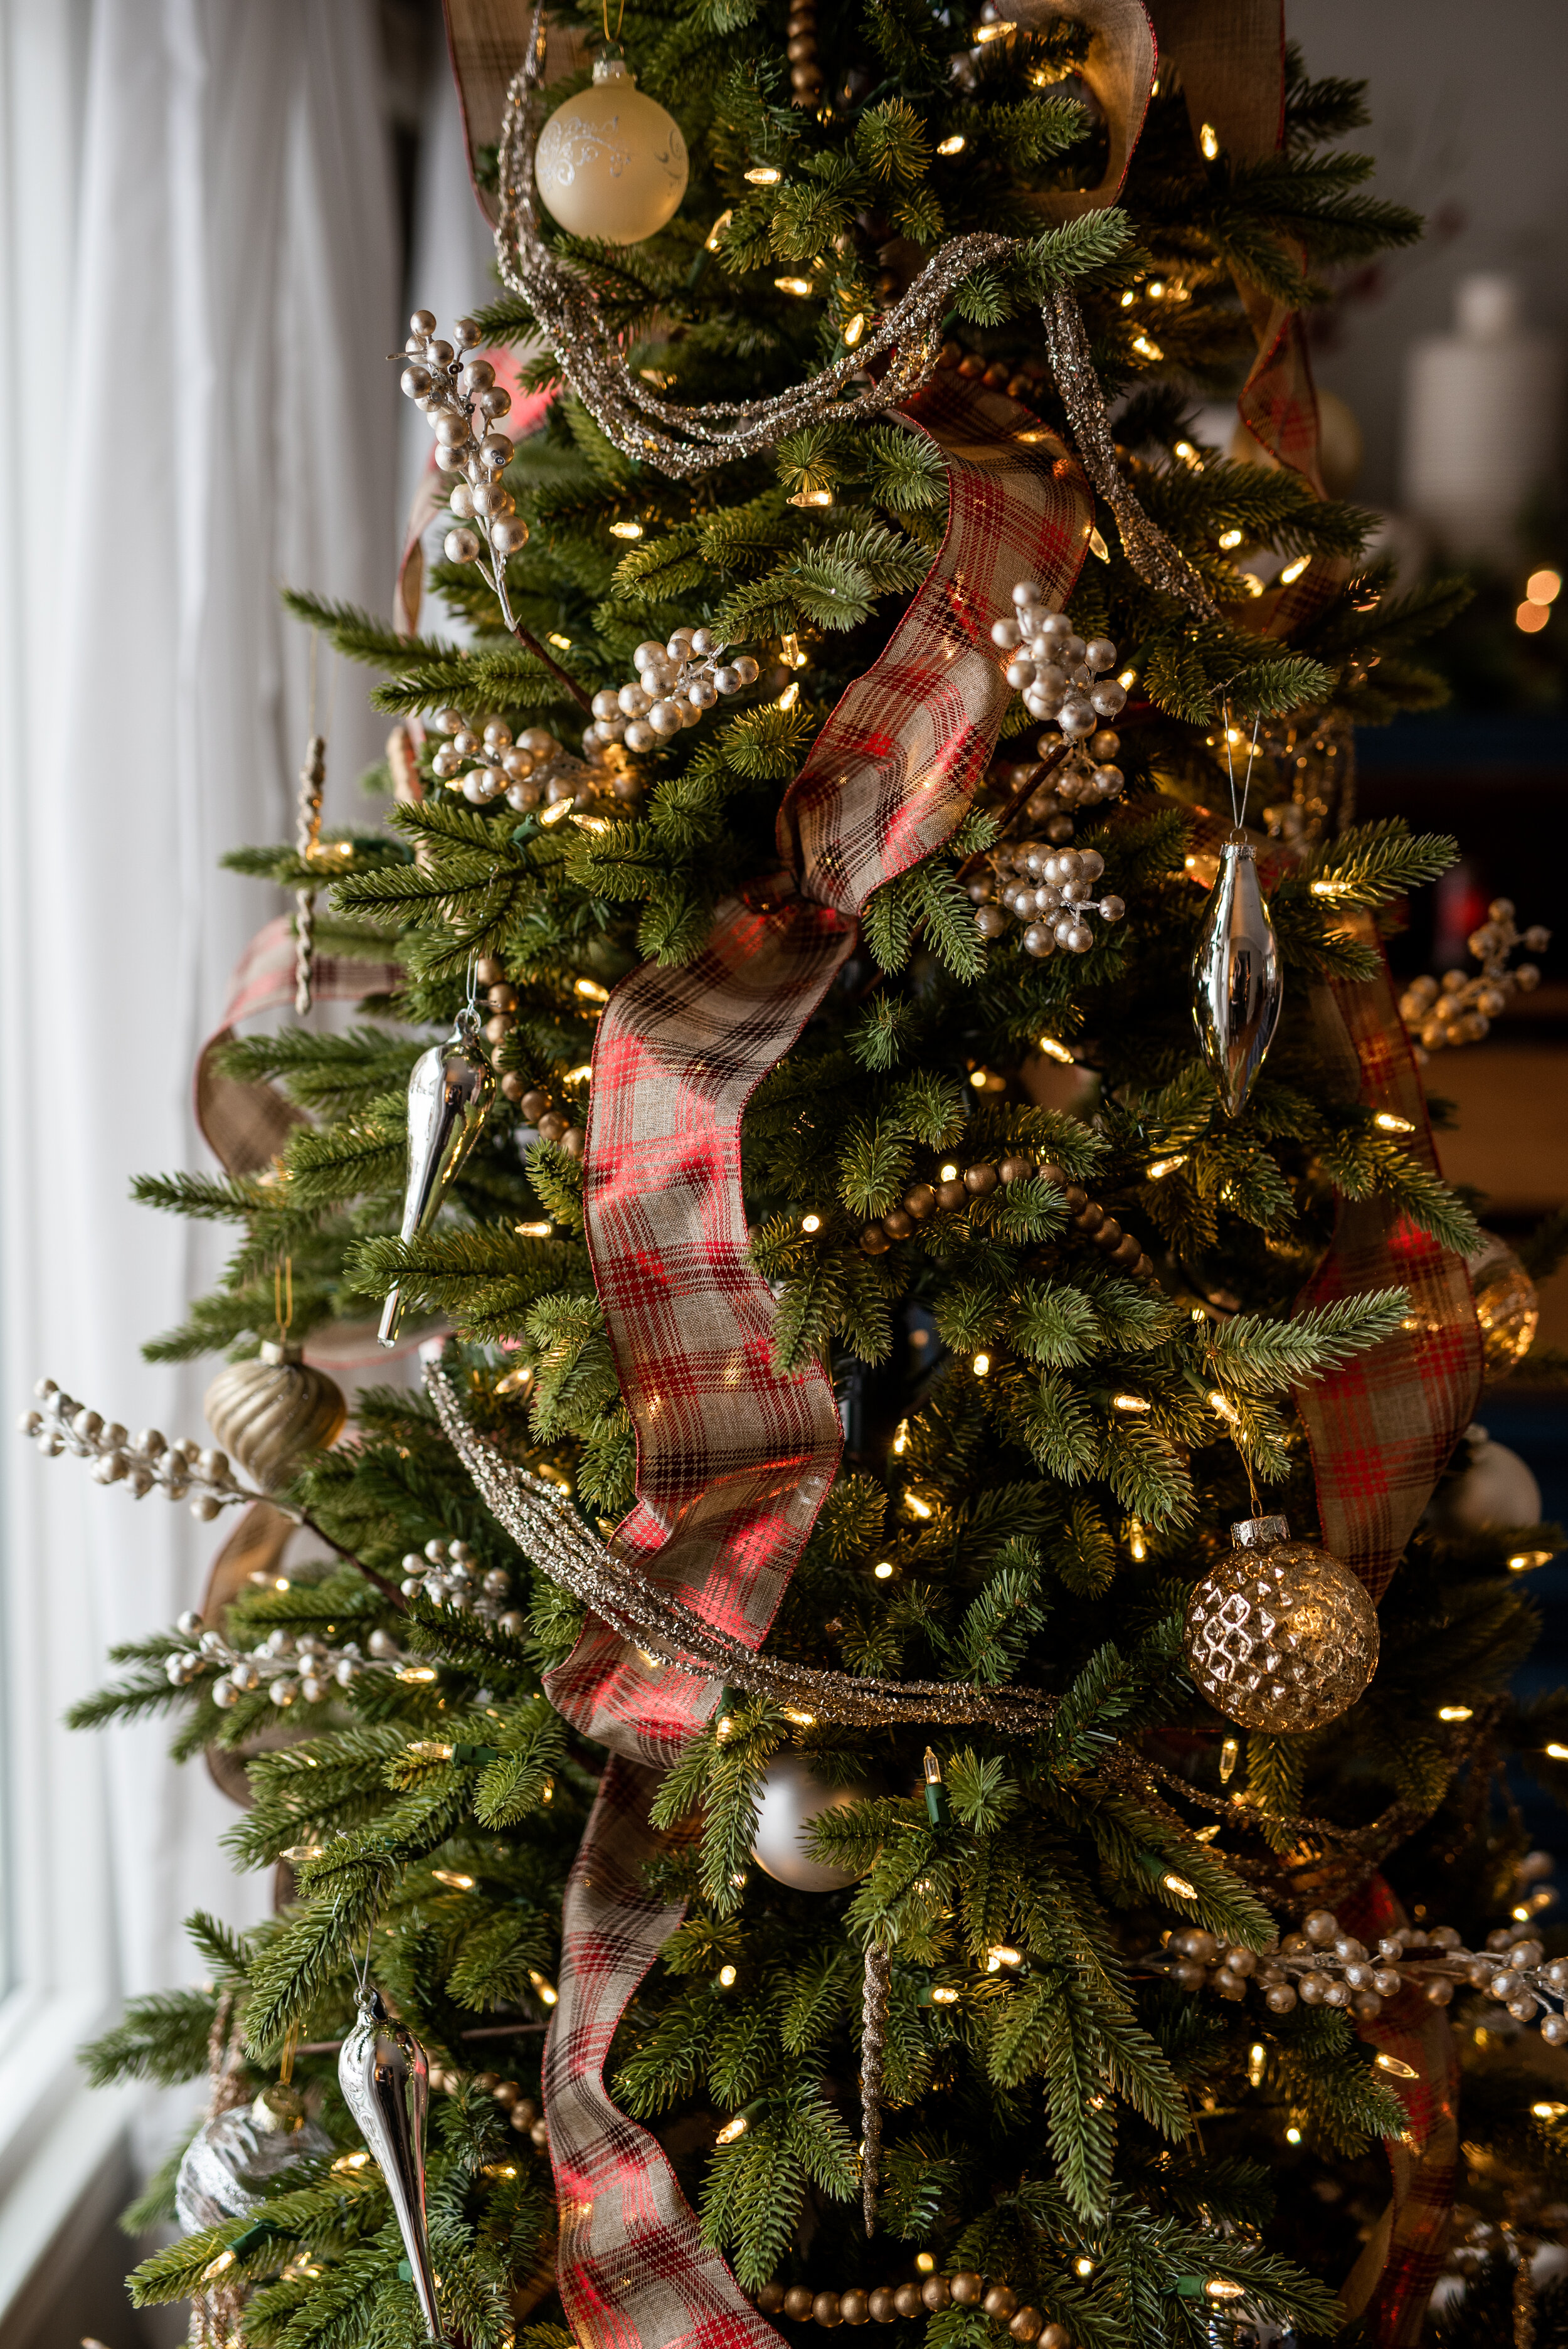
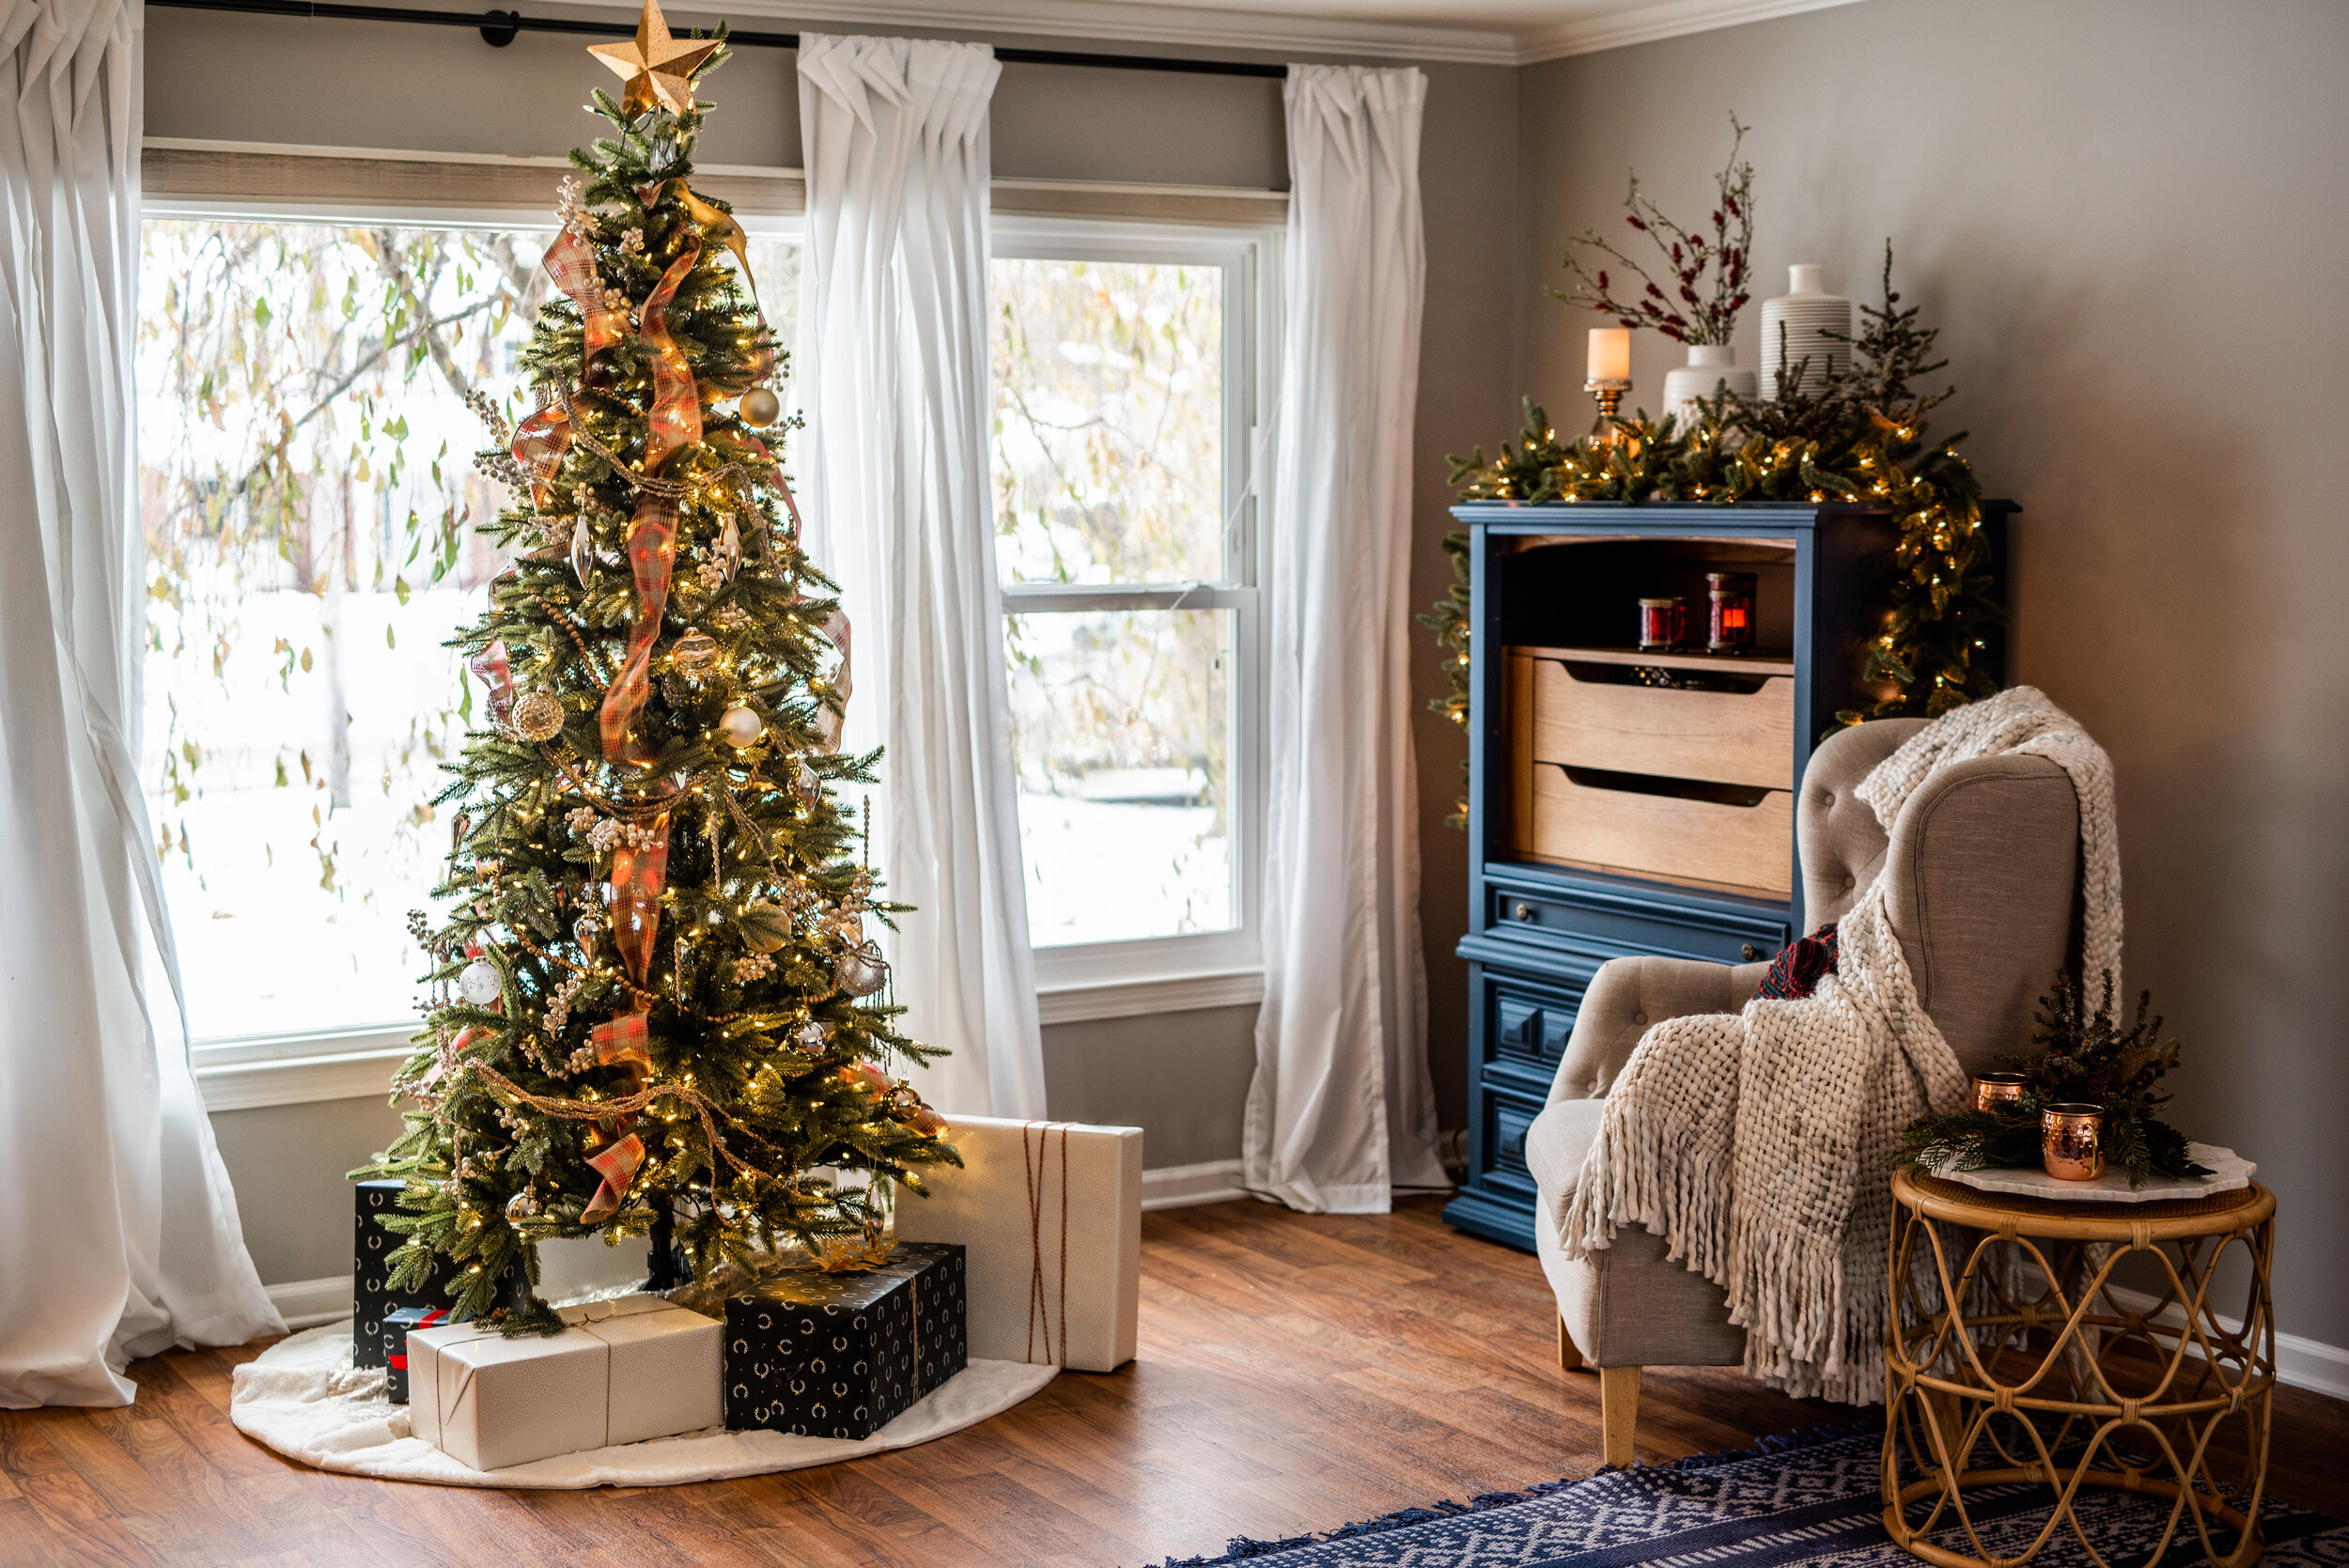
She picked the pre-lit Kennedy fir with Quickset LED Clear lights (one of my favorites!), and the accompanying wreath & garland. After seeing a few of her holiday inspiration pictures, I chose the Tree Classics, Shimmering Snow Faux Fur Tree Skirt, Festive Holiday Picks in silver and two ornament sets from the silver and gold ornament collection.

untitled-27.jpg

Decorating Jess’s house was definitely a team effort from start to finish. Rachel and I had about 4 hours to get the tree, garland, and wreath set up and all the decor in place. Many hands certainly do make for light work, and between me, Rachel, Jess and her friend, Jill, we decked the halls in record time.

So much of decorating for the holidays (and in general) is arranging the things you love and adding layers. Jess already had some beautiful pieces, so Rachel and I quickly got to work setting up the greenery and adding touches of Christmas to Jess’s armoire, seating area, and front entry.

From Tree Classics, 7.5ft. Kennedy Fir Narrow Artificial Christmas Tree with Quickset LED Clear lights, Silver Berry Holiday Picks, and Silver & Gold Ornament Collection. Ribbon from Walmart, gold beads from World Market (past season), and gold …

From Tree Classics, 7.5ft. Kennedy Fir Narrow Artificial Christmas Tree with Quickset LED Clear lights, Silver Berry Holiday Picks, and Silver & Gold Ornament Collection. Ribbon from Walmart, gold beads from World Market (past season), and gold beaded garland from local Hillsdale boutique, MaryBeth’s

untitled-46.jpg
untitled-20-Edit.jpg
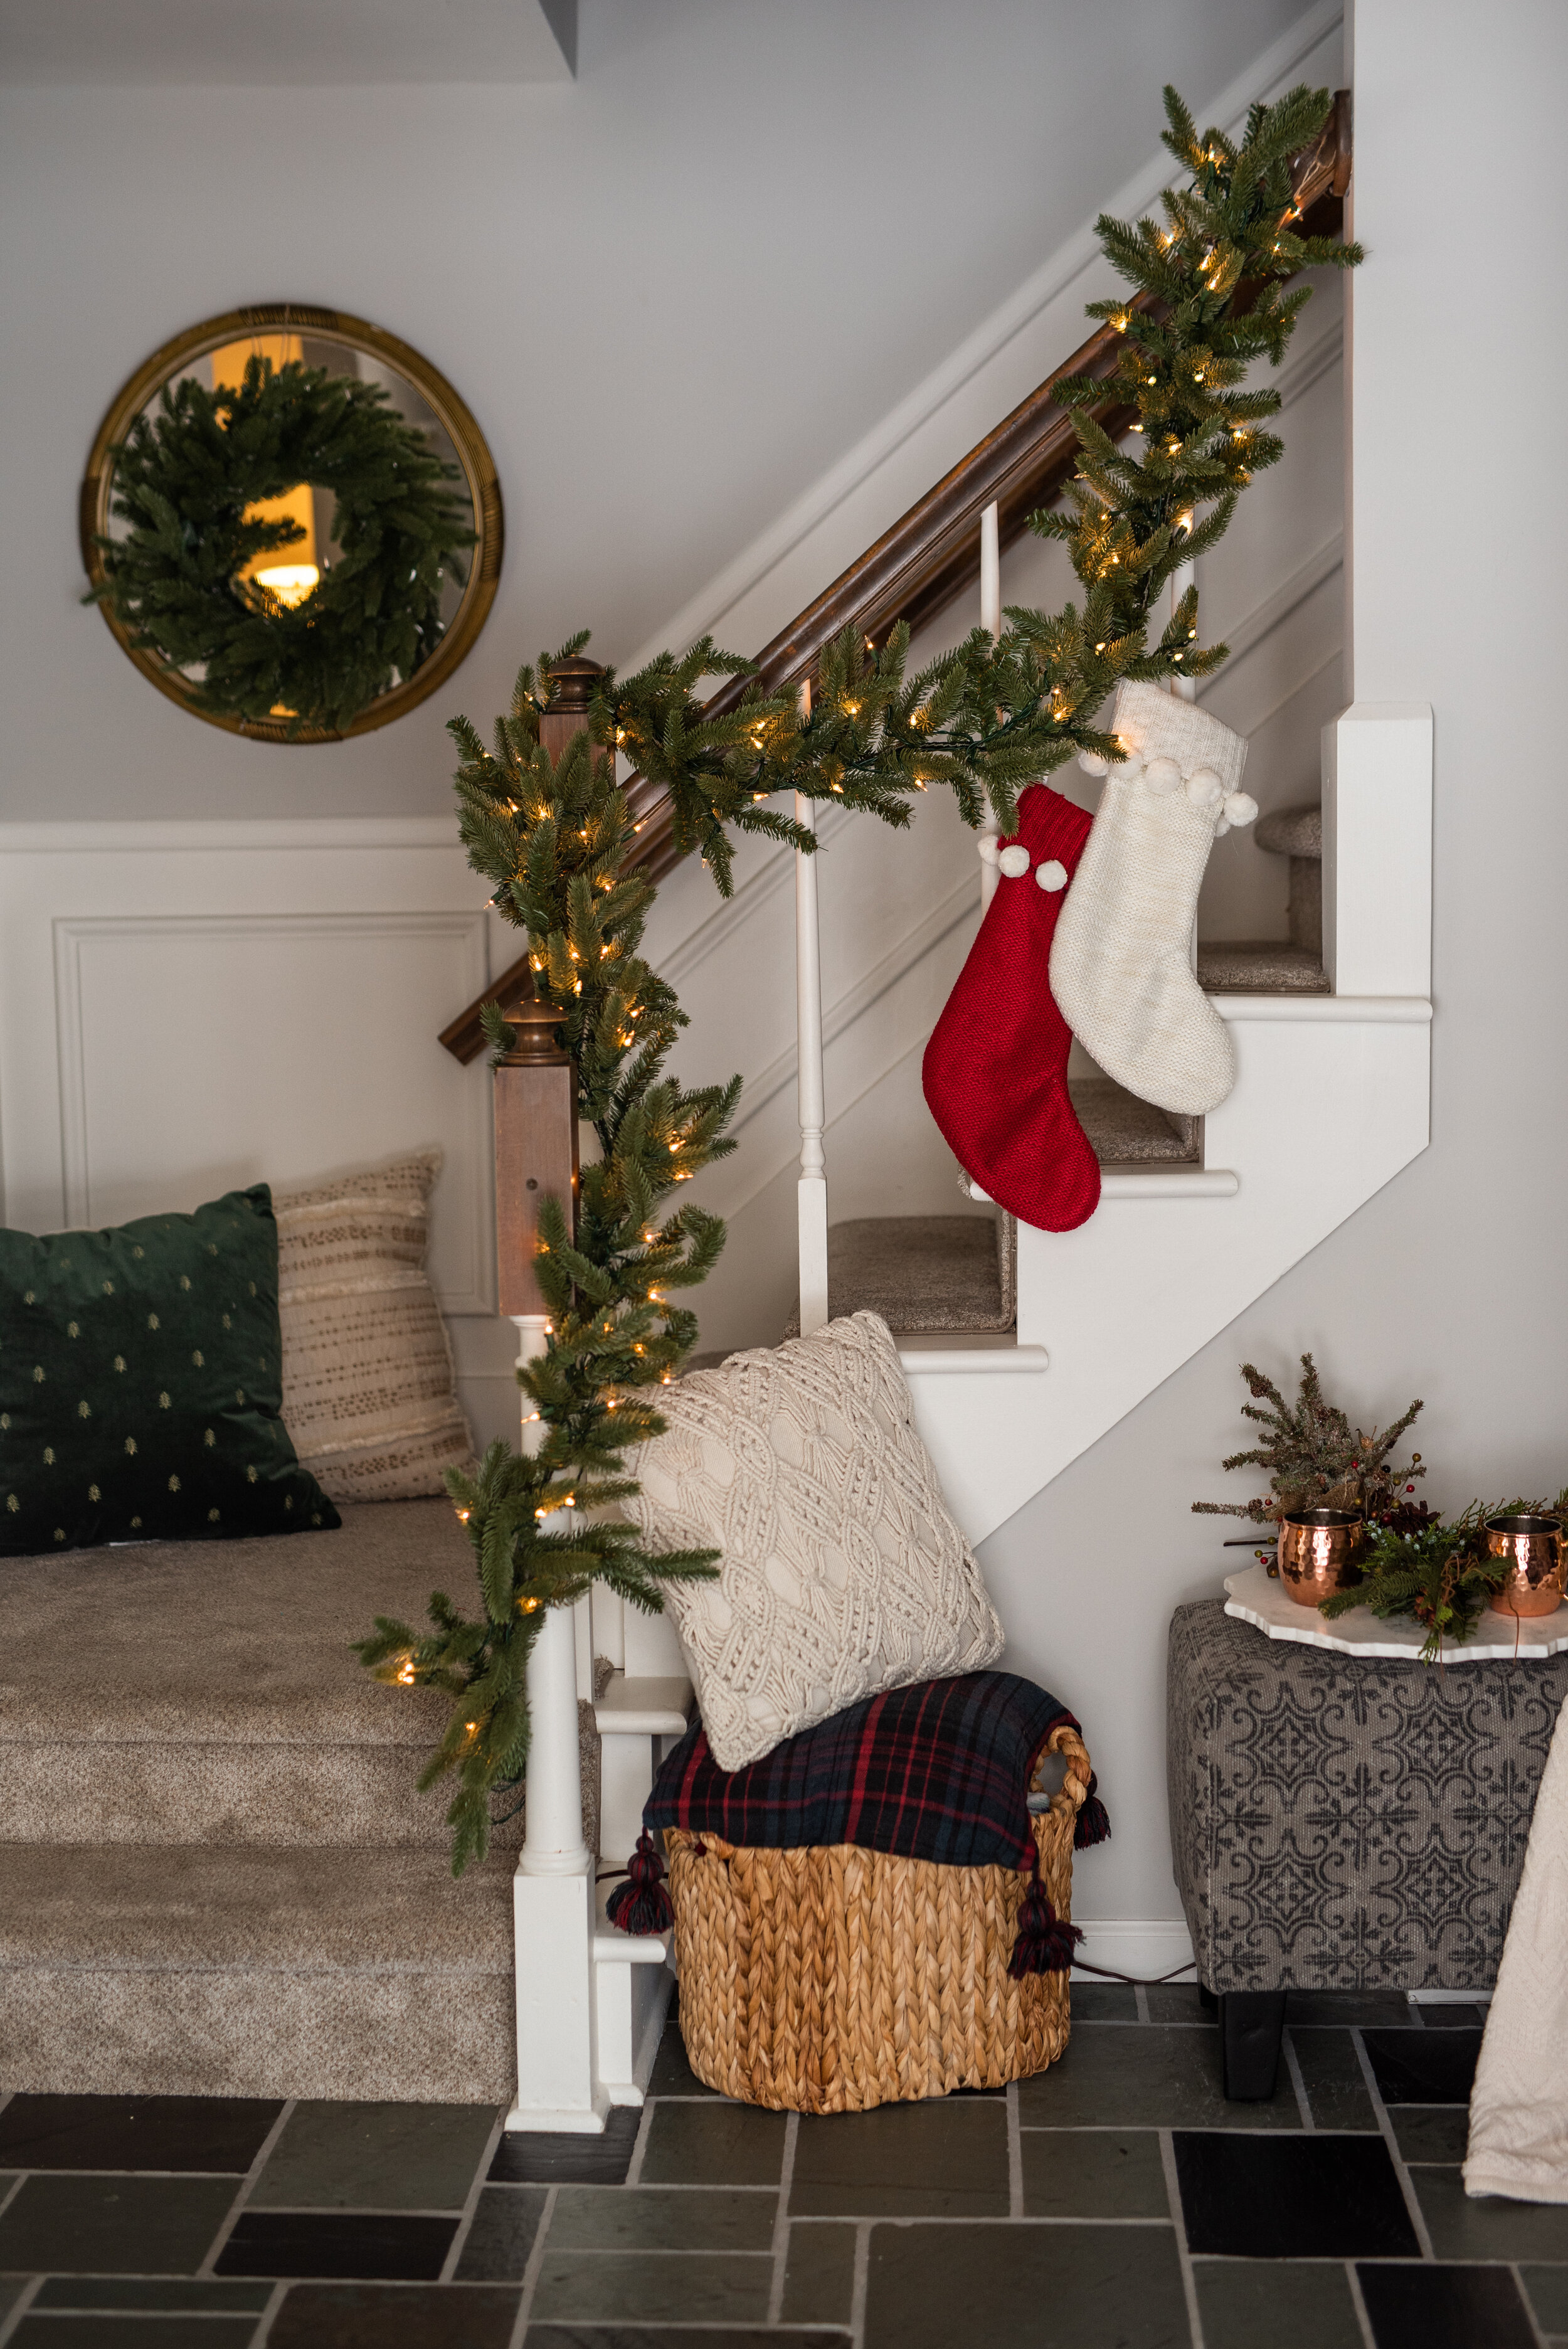
Rachel and I pulled in a few soft touches & signage to create a welcoming entry. On the landing, we used a mirror as the base and added the 24” Kennedy fir wreath. Mirrors, layers, texture are a great combination. Wreath and garland from Tree Cl…

Rachel and I pulled in a few soft touches & signage to create a welcoming entry. On the landing, we used a mirror as the base and added the 24” Kennedy fir wreath. Mirrors, layers, texture are a great combination. Wreath and garland from Tree Classics. Pillows on steps from Target, 2019 Holiday Collection. Knit Stockings, Target 2019.

Holiday greens, sprigs of berry, and a touch of copper add holiday cheer to Jess’s entry.

Holiday greens, sprigs of berry, and a touch of copper add holiday cheer to Jess’s entry.

Based on Jess’s living room decor and her inspiration photos, I pulled in some soft silver, gold, and just a touch of red to add a spark of color.

Based on Jess’s living room decor and her inspiration photos, I pulled in some soft silver, gold, and just a touch of red to add a spark of color.

While Christmas is so much more than decorations or a tree—somehow the beauty of lit greens, our favorite cherished stockings and ornaments, music playing, a fire crackling, cooking & baking, giving in abundance, and ultimately gathering with those we love, all blended together in December creates beautiful memories. A big thank you to Jess for allowing us to trim her lovely home, and to Tree Classics for sponsoring this post. And definitely check out these fellow bloggers who are sharing their family holiday traditions and decor throughout the week!

Excited to share holiday decor & traditions with these fellow bloggers! Sharon of Sweet Honey Cottage @sweethoneycottage; Kaitlyn of Fresh and Vintage Living @freshandvintageliving; Romelia of Life Through Mama Eyes, @lifethroughmamaeyes, Caitly…

Excited to share holiday decor & traditions with these fellow bloggers! Sharon of Sweet Honey Cottage @sweethoneycottage; Kaitlyn of Fresh and Vintage Living @freshandvintageliving; Romelia of Life Through Mama Eyes, @lifethroughmamaeyes, Caitlyn of Caitlyn Neier, @caitlynneier

Thanksgiving with Tree Classics

Rachel’s dining room, set for Thanksgiving. Kennedy Fir, 7.5’ via Tree Classics. Table layered with favorite dishes, linens and silverware. Sources listed below.

Rachel’s dining room, set for Thanksgiving. Kennedy Fir, 7.5’ via Tree Classics. Table layered with favorite dishes, linens and silverware. Sources listed below.

Happy November! In Michigan, it' is officially late fall (this is not based on the calendar, but the temperature) and ready or not, the holidays are upon us! In our family, the week of Thanksgiving has always been ushered in by a flurry of celebrations. We have 6 family birthdays between Thanksgiving and the New Year, and Brock and I celebrate our anniversary to boot . Side note: I was 23 when we were married and couldn’t fully appreciate the stress/busyness of the holiday season. : ) Yet somehow, despite birthdays, anniversaries and 3 major holidays, my mom and grandma always made the holiday season feel special and full of “sneaky surprises.”

Growing up, I was firmly in the, you don’t decorate until after Thanksgiving. In fact, I remember my mom waiting to get a Christmas tree until mid-December. But over the years—and I’m sure that working for a tree company has influenced me a bit— I’ve grown to love the slow roll out of holiday decor. I start early in November, and by Thanksgiving, I’m in pretty good shape on the decor front. Pre-decorating has opened up my December schedule, and has allowed me to do a bit more holiday baking & entertaining.

Thanks2019(39of56).jpg

This year, I started decorating at my friend & photographer, Rachel’s house. She has lovely 9 ft ceilings and a great dining room for entertaining. I chose one of my favorite trees, a 7.5’ Kennedy fir from Tree Classics to add a bit of holiday ambiance. It’s amazing how twinkle lights brighten a gray fall day!

To bridge the Thanksgiving and Christmas season, I mix some of my favorite holiday greens, along with fall accents. This year I chose warm cozy touches—mostly a mix of creams, green, gray, and dark brown hues. So much of decorating is trial and error. I pick some of my favorite colors for the season, shop my houses and then fill in with a few new pieces. Once I start decorating, I just layer, layer, and layer some more.

Layering includes color, texture and size. Note that on the tree I used oversize ivory colored florals, miniature pumpkins, and faux wheat and common cat tail for color and texture. I added black and white buffalo check ribbon that ties together the table and coordinates with pumpkins at the bottom of the tree.

Tree Classics, 7.5” Kennedy fir. This particular tree has been a perennial favorite of mine. It has a slender profile and real feel tips. And it fits beautifully in Rachel’s dining room—providing the soft white lighting and winter foliage, but allow…

Tree Classics, 7.5” Kennedy fir. This particular tree has been a perennial favorite of mine. It has a slender profile and real feel tips. And it fits beautifully in Rachel’s dining room—providing the soft white lighting and winter foliage, but allowing guests space to move around the Thanksgiving table.

Something old: Buffalo checked ribbon from Michaels, a black and white runner from Ikea, ivory dishes via Pioneer Woman, silverware and linen napkins from World Market. For a full list of all my sources, see my list below with links.

Something new: Water hyacinth pumpkin, candles and candlestick holders, all from Target. Transfer ware dark brown plates from TJ Maxx (I could only find six, and I hit at least 6 TJ’s from Ann Arbor to Grand Rapids. ; ) For the tree: Faux pumpkins, gingham pumpkins (TJ Maxx), silk flowers and faux wheat (Target dollar section) and wood garland (Creative co-op

7.5” pre-lit, quick set Kennedy fir.

7.5” pre-lit, quick set Kennedy fir.

On social media, I did a quick poll on whether you were team “decorate before Thanksgiving” or “decorate after Thanksgiving.” You all definitely had opinions, which I love, and it was a split decision with a variety of rules surrounding pre Thanksgiving decorating. For me, it’s slowly decorate with a mix of fall and Christmas decor. But definitely no Christmas music or movies until Thanksgiving weekend. Some of you said, yes to decor, but no tree until Thanksgiving. Love it! Others said after Thanksgiving because it’s the natural start of advent, and some strongly believe that Christmas decor belongs in December only. I would love to hear some more of your holiday decor thoughts & favorite Thanksgiving traditions!

Thanks2019(6of56).jpg
Ready for Thanksgiving. The table is set, tree and wreath are fluffed and decorated. Wreath: 24” Classic Festive Fraser Fir from Tree Classics. Tree: 7.5' prelit, Kennedy Fir.

Ready for Thanksgiving. The table is set, tree and wreath are fluffed and decorated. Wreath: 24” Classic Festive Fraser Fir from Tree Classics. Tree: 7.5' prelit, Kennedy Fir.

And clearly, I’ve trained my own children to anticipate the holidays. No sooner had we cleaned up the Halloween candy, when my 10 year old daughter asked, “when can we put up the Christmas trees?,” naturally, I was delighted. She loves the the coziness and beauty that comes from a house filled with twinkle lights. And in the midwest, where fall ushers in cold weather and shorter days, twinkle lights and holiday celebrations are a delightful reminder that winter is a great time to cozy up together. So bring on celebrations—family, friends, abundant feasting, warm drinks, and cozy nights before the fire.

A big thank you to Tree Classics for sponsoring this post. Check a few of my other blog friends as they share some of their favorite Thanksgiving memories! Come back next week when I will share a few favorite “Friendsgiving” recipes!

Kicking off the holidays with these Blogger friends!

Kicking off the holidays with these Blogger friends!

Kristine of Bold Boundless Blonde, @boldboundlessblonde_

Kelly of City Girl Meets Farm Boy,@citygirlmeetsfarmboy

Mary of Selah Pines Farmhouse, @selah.pines.farmhouse

Lori of My Lovely Texas Home, @mylovelytexashome

Katie of Baker Nest, @baker_nest

Source List:

Kennedy fir, 7.5’ prelit quick set tree, Tree Classics

Classic Fraser fir decorated wreath, 24” Tree Classics

Tree:

Wood garland, Creative Co-op. I really like this brand—usually found at boutiques. I found the garland at Lake St. Design Studio in Petoskey, MI and at our local Hillsdale boutique, MaryBeth’s.

Silk flowers & faux wheat: Target Dollar Bin

Faux pumpkins (gingham & pumpkin picks): TJ Maxx

Tablescape:

Water Hyacinth pumpkin, Opalhouse for Target, fall 2019

Gold Candlestick holders , Target

Candles, Magnolia for Target

White plates, Pioneer Woman, Walmart

Brown transferware plates, TJ Maxx

Gingham faux pumpkins, TJ Maxx

Twig Silverware, World Market

Linen napkins, World Market

Tablerunner, Ikea

Plaid wool blanket, Pottery Barn (no longer for sale)


Christmas in July with the B Brave Foundation + Cleveland Clinic Children's Hospital

Christmas in July with the B Brave Foundation + Cleveland Clinic Children's Hospital

With a big thanks to Tree Classics, I had the privilege to celebrate Christmas in July with the B Brave Foundation and Cleveland Clinic Children’s Hospital. Santa and his elves came, we celebrated with a 9 ft. Blue Spruce, music, crafts and gifts!

Read More

Cooking with friends: Prepping & Roasting Lamb

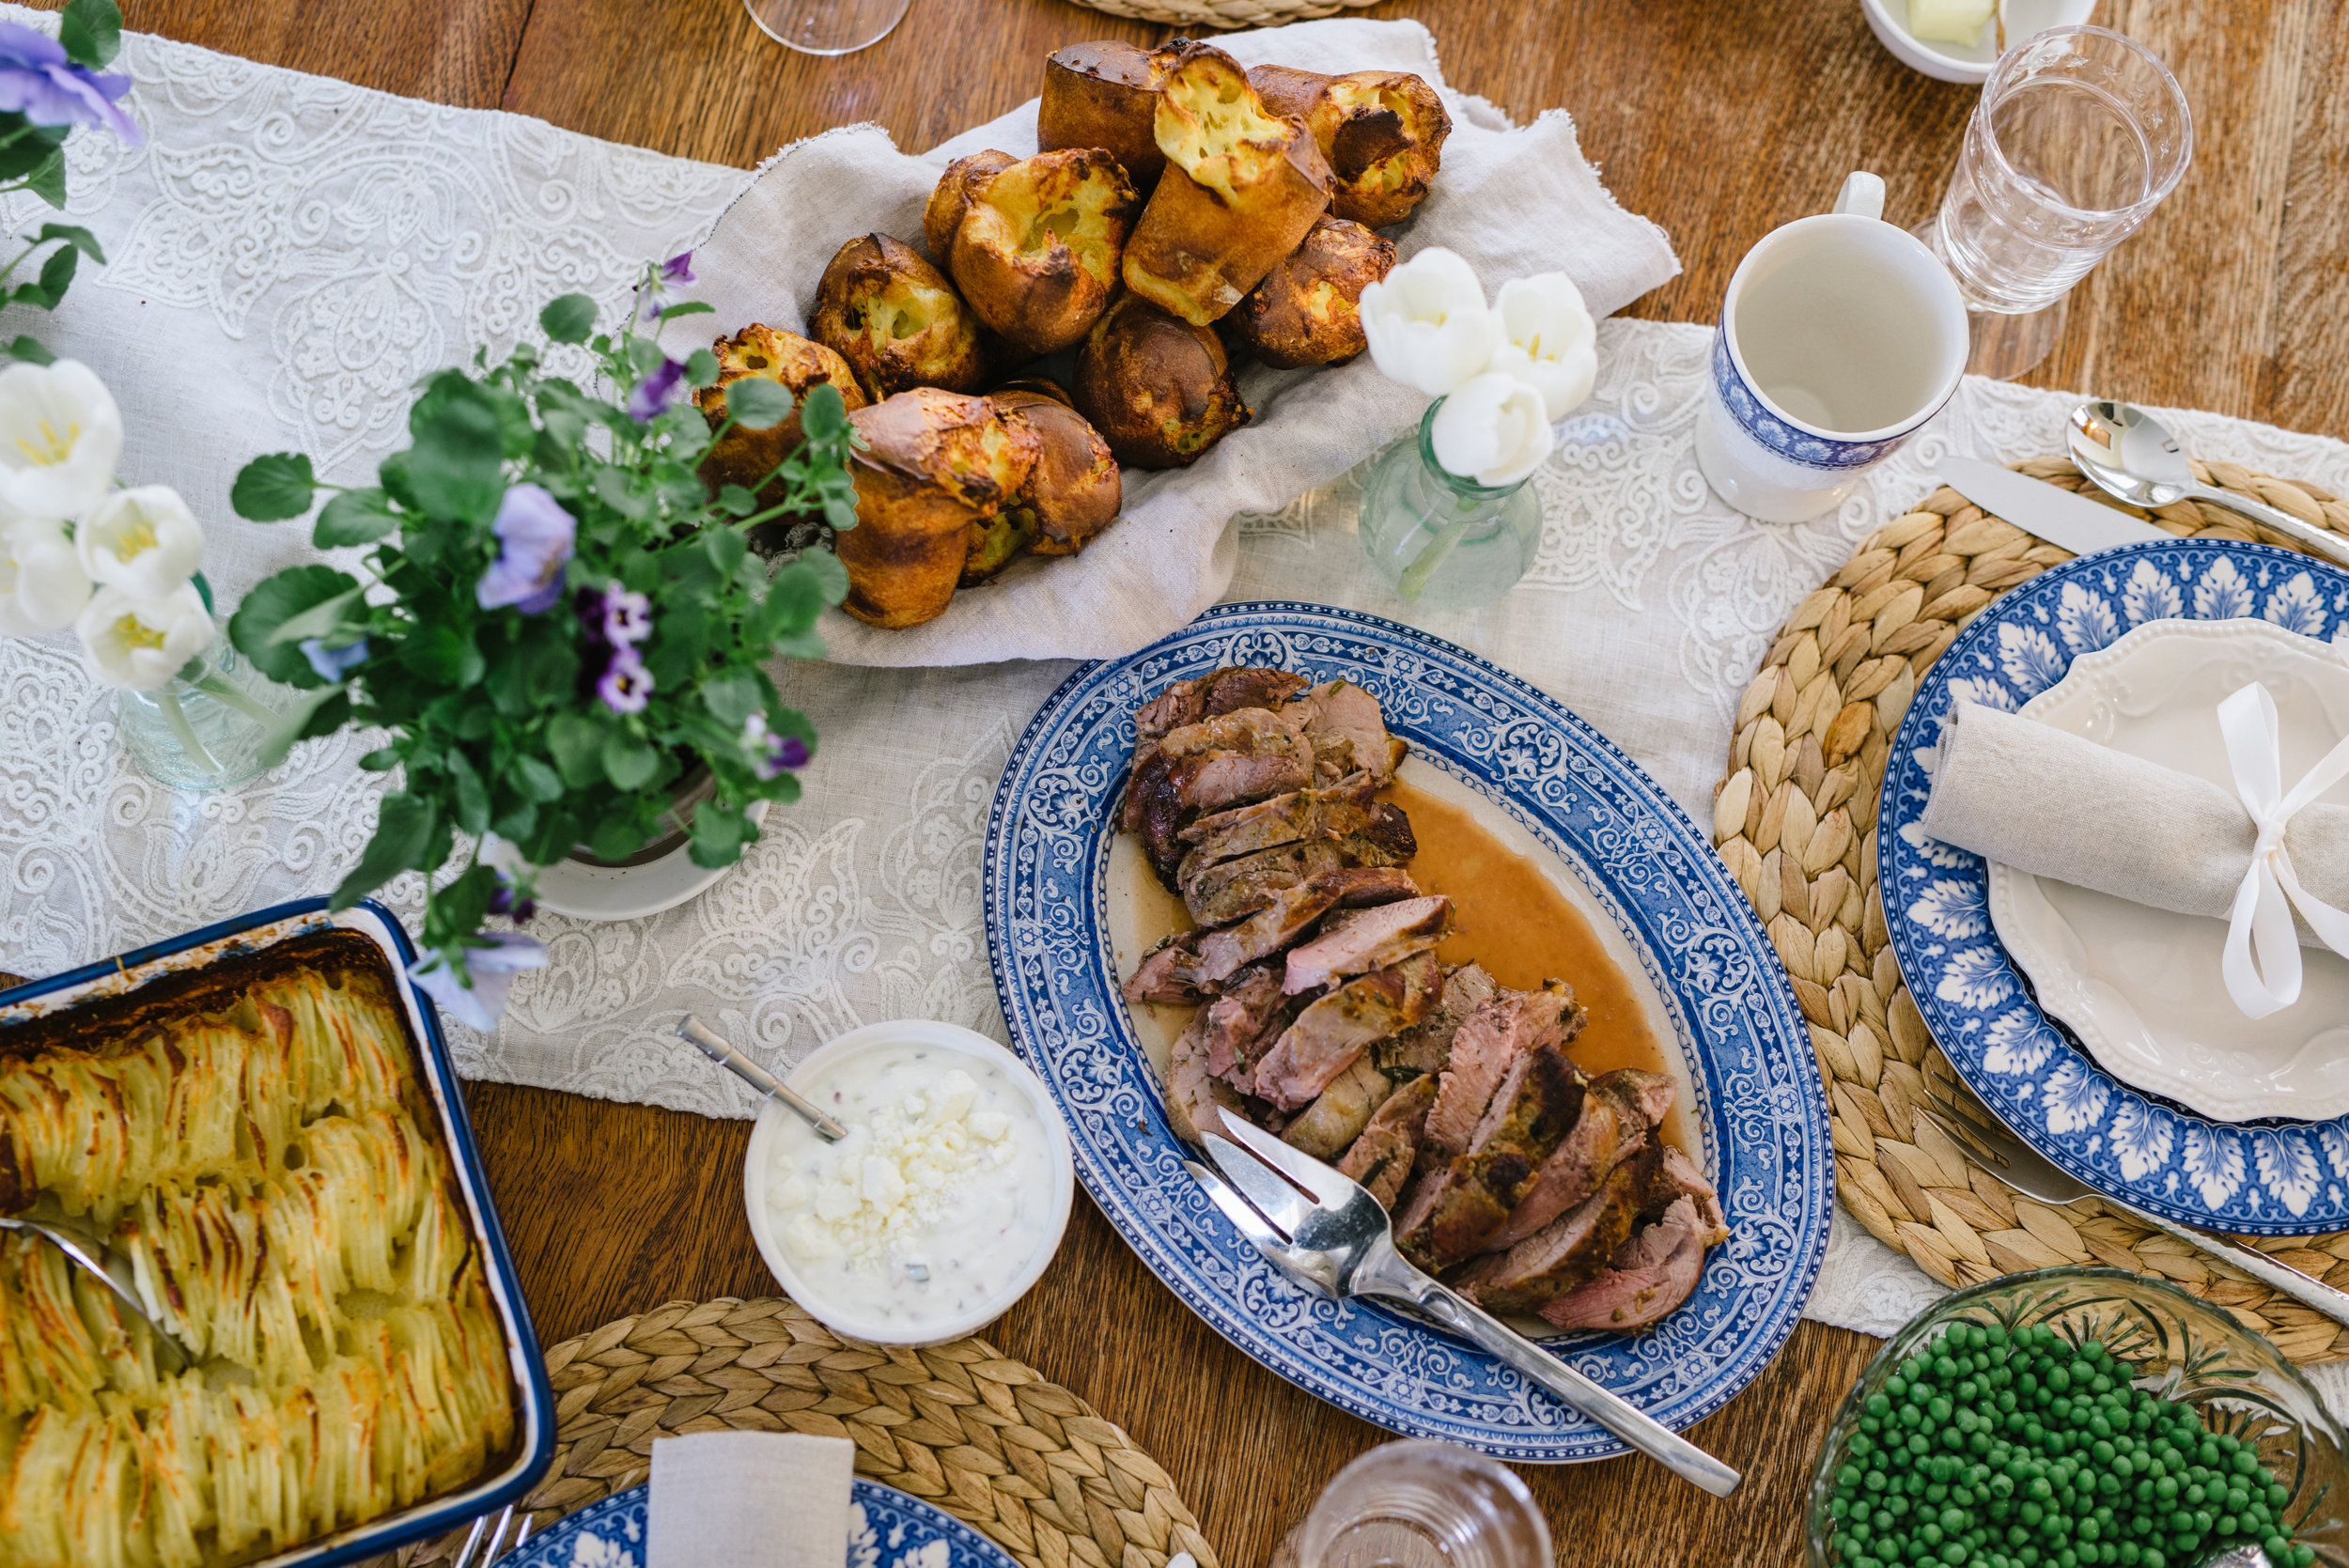
easter19(15of22).jpg

This week I’m sharing our Easter dinner menu, as well as tips for preparing a holiday meal. For Easter, I often make ham with a grainy mustard & brown sugar glaze, but this year I wanted to try lamb—It feels special and seasonal.  But while I love lamb, but I’m slightly intimidated to make it.  The meat is tough if over cooked and can taste gamey if not properly prepared. 

Me & Steph. Excited to pass along her impressive tying & trussing skills.

Me & Steph. Excited to pass along her impressive tying & trussing skills.

With this in mind, I’m excited to introduce my friend, Stephanie Maxwell, who walks me through a step-by-step tutorial on preparing and roasting lamb (check out videos at the end of this post). Steph is a great cook (think modern-day Julia Child), and I know I will be referencing her tying and trussing tips for years to come!

Below is what’s on the menu for Easter dinner. And what I really like about this menu is that everything can be prepped the day before, which makes day-of prep much easier.  

Menu

A couple quick planning suggestions. Split the work into three days if possible—Trust me, it’s much more enjoyable for everyone if you plan ahead. My natural inclination is towards procrastination, or overfilling my schedule, but years of holiday meals and event planning has taught me that slow and steady is the better course of action.

Day 1 (Friday). Make grocery list and shop.

Day 2 (Saturday). Prep as much as possible (including setting the table).

  • Prepare popover batter.

  • Make pie crust & filling. Pie should set overnight in fridge.

  • Make lamb rub, prepare & truss lamb, refrigerate overnight.

  • Peel and slice potatoes (store in water in an airtight container).

Day 3 (Sunday). Finish assembling and cooking food.

  • Prepare a timeline. (Often I just use a scratch piece of paper to make sure I know what time everything needs to be in and out of the oven in time for dinner, but both my mom and Stephanie keep spread sheets for events). Not only does this keep things super organized, it’s also helpful from year to year to look back at menus & timelines. It’s amazing how much you forget from one year to the next!)

easter19(9of22).jpg

Lamb: Make the rub, trim and truss lamb the night before.

Stephanie’s rub for a 5-6 lb. leg of lamb:

  • 3 cloves of garlic

  • 2 tsp of salt

    Pound garlic and salt in mortar with pestle until a paste forms. (A small food processor would also work if you don’t have a mortar.) Add rosemary, oregano & lemon:

  • 2 TBSP rosemary

  • 1 TBSP oregano

  • Zest of 1 lemon (Make sure not to get the pith or white skin beneath the yellow lemon zest.)

    Grind the herbs and zest into the garlic-salt paste in the mortar (or food processor), and then add:

  • 1/4 cup of olive oil

  • 2 TBSP lemon juice

  • 1 tsp of ground pepper

  1. Trim as much fat as possible from the lamb. As I learned from Stephanie, the gamey taste resides in the fat, so remove as much fat as possible before butterflying.

  2. Butterfly the meat. Place lamb fat-side down and score interior of the lamb so the rub can penetrate the meat. (Be careful not to cut the meat all the way through).

  3. Spread half of the rub into the scored meat, and then roll the meat before trussing.

  4. Truss the lamb and cover with rub. (Watch the trussing and tying video for detailed instructions). Marinate a few hours or overnight.

Roasting Lamb:

Roast at 450 degrees for first 20 minutes, and then reduce the oven to 375 until the roast reaches an internal temperature of 130-140 degrees (usually about an hour). In this case, we roasted a 4 lb lamb, and it took about an hour total. Note that your roast will continue to cook as it rests. So if you plan to let it sit for more than 10 minutes, take it out when the internal temperature reaches 130 degrees to ensure you don’t end up with overdone meat. Serve warm with one or both of the sauces below.

Yogurt sauce: Mix together

  • 1 cup whole milk plain yogurt,

  • a squeeze of lemon to taste, salt to taste,

  • 1/4 c. diced onion,

  • 1/4 c diced cucumber,

  • chopped chives,

  • a pinch of cayenne,  and

  • feta on top (optional)

Chimichurri sauce: Mix together

  • 1/4 c. olive oil

  • 1/4 c. red-wine vinegar

  • 1/4 c. finely chopped onion

  • 2 TBSP minced red bell pepper

  • 1 1/2 tsp minced garlic

  • 2 TBSP chopped flat-leaf parsley

  • 1 1/2 tsp oregano leaves

  • 1/4 tsp hot red-pepper flakes

easter19(18of22).jpg
Cheddar Popovers with homemade jam. Popover recipe adapted from Cooks Illustrated Baking Book. I added cheddar cheese—so good.

Cheddar Popovers with homemade jam. Popover recipe adapted from Cooks Illustrated Baking Book. I added cheddar cheese—so good.

Popovers—Recently, Brock and I ate at a steakhouse and had the most delicious cheddar-cheese popovers. This started me on a quest to find a recipe for Easter. They feel like fancy holiday fare, but truthfully, the batter is simple to make. I use a 12 cup mini-popover pan, though I read a number of recipes that say you can use non-stick muffin pans as well (you fill half full). After making a recipe from The Joy of Cooking and a Cook’s Illustrated version, I settled on the Cook’s Illustrated recipe.  There are a few key differences between Cook’s Illustrated and The Joy of Cooking.

First, to get tall, substantial popovers, Cook’s Illustrated doubles the batter, and they also use bread flour.  Second, because they use bread flour, they have you rest the batter for an hour or over night. This is a bonus for me—it allows me to make the batter the day before and bake the popovers the day of.  You can also make them ahead and warm up in the oven.  Also, I added cheddar cheese to my recipe. Pour batter into each mini-popover cup (about half full), sprinkle the batter with cheese (about a 1-2 TBSP) and then top each cup with more batter. Each popover cup should be about 2/3rd full before baking. Serve with homemade jam & butter.  I find that the trickiest part of making popovers is really knowing your oven—With both recipes, my popovers cooked in 1/4 of the time listed in the recipe. I suggest using the oven light to watch that they get a deep golden brown, but do not burn.

easter19(19of22).jpg

Cheesy Hasselback Potato gratin. This has become a favorite at our house. A couple of tips:  I peel and slice my potatoes the night before, cover with water and store in the fridge.  The water & dark fridge keep them from browning.  I drain them before tossing with the garlic, cream & cheese mixture. And once I stack the potatoes in rows in the baking dish, I immediately pour the remaining cream mixture over the potatoes—I’ve found that half way up the side of the potatoes is good coverage (enough that it’s rich and creamy, but not too much that it spills over the pan).

Baby peas—frozen baby peas (I used Birds Eye brand).  Stephanie taught me a great way to gently prep peas so they don’t get shriveled and over cooked.  Boil water, place peas in a colander and pour hot water over the peas.  Toss as you go to defrost peas.  Serve with a pat of butter and salt to taste.  So easy & delicious.  Thanks, Steph! 

Lemon pie from the Magnolia Table Cookbook.

Lemon pie from the Magnolia Table Cookbook.

Lemon pie. I found this delicious and simple recipe in the Magnolia Table Cookbook.  It reminds me of key lime pie.  I made an easy graham cracker crust (also the day before), and made the custard the day before as well.  Future tweaks: I would add some lemon zest to kick up the lemon flavor a notch. 

So that’s my Easter menu. Check out the prepping and roasting lamb videos below. And of course, I would love to hear what’s cooking at your house!

Best way to cook St. Paddy’s-inspired corned beef (and it's not what I expected!)

Photo by Rachel Cuthbert Photography

Photo by Rachel Cuthbert Photography

To all of my Irish friends & wannabe Irishmen (this includes me), I’ve been on a quest for the perfect corned beef. How many of you the week of St. Paddy’s Day think, I want to make corned beef at home but don’t because either you don’t make it often enough, never make it, or find yourself overwhelmed by the endless recipes online? If so, this post is for you. This year, I purchased two corned beefs and made them two ways—by oven & Instant Pot.

Irish Soda bread, recipe via Ina Garten, Photo by Rachel Cuthbert Photography

Irish Soda bread, recipe via Ina Garten, Photo by Rachel Cuthbert Photography

Quick backstory: Each year, as long as I can remember, my Italian grandmother celebrated St. Patrick’s day with a traditional corned beef and cabbage feast. And since I moved away from my hometown of Cleveland nearly 8 years ago, I had to learn how to make it for my family. So year after year I would call my grandma and ask her to remind me how to cook cabbage and noodles, how to boil corned beef, and glaze carrots. Slowly, I’ve added my own traditions. I found a delicious Irish Soda bread recipe via Ina Garten (she’s often my go to), and I started to experiment with corned beef recipes. Instructions on the package are fine, but I knew there were ways I could add a little pizzazz.

Two years ago, I found a corned beef recipe via Rachel Ray that included a brown sugar & stone ground mustard glaze (I also included it at the end of this post). You roast it in the oven for about two hours, wrapped in foil and covered with the glaze. My favorite thing about this recipe is the glaze, but I struggled to get the beef super tender. This year, I decided I would experiment with oven vs. the Instant pot. Increasingly, my Instant Pot has become my go to. In my opinion, it’s way better than the crockpot—I find that most things in the crockpot end up tasting the same.

Despite my growing love for the Instant Pot, I was a bit nervous to try it with the corned beef. The verdict (taste tasted by friends with refined palettes): While both the oven and the Instant Pot took about two hours, the Instant Pot corned beef (see adapted recipe at end of post) was fall apart tender—not mushy. Because my favorite part of the oven roasted recipe is the glaze, this weekend I plan to make more corned beef in the Instant pot, and finish it off in the broiler with the brown sugar/mustard glaze. I will keep you posted!

Corned beef roasted in the oven, Photo by Rachel Cuthbert

Corned beef roasted in the oven, Photo by Rachel Cuthbert

Oven vs. Instant Pot Corned beef

Corned beef cooked in the INstant Pot, Pictured above is a reuben sandwich—a great alternative if you aren’t a straight up cabbage and noodles fan, or a great way to use up leftovers. I follow a recipe from Zingerman’s Deli—A well known & loved …

Corned beef cooked in the INstant Pot, Pictured above is a reuben sandwich—a great alternative if you aren’t a straight up cabbage and noodles fan, or a great way to use up leftovers. I follow a recipe from Zingerman’s Deli—A well known & loved deli in Ann Arbor, MI. Their thousand Island dressing is delish (it’s the only time I use thousand Island, and I love SauerKraut from Mcclures.—a small batch company out of Detroit/brooklyn. Photo by Rachel Cuthbert

stpat19(20of20).jpg
Tablescape pre food: Platter, Williams Sonoma; plates, Homegoods; grass charger, Ikea; Glassware, Hearth & Hand, Target; runner, Hand sewn by friend, Peggy Stewart, fabric from Waverly/purchased at Walmart. Photo by Rachel Cuthbert Photography

Tablescape pre food: Platter, Williams Sonoma; plates, Homegoods; grass charger, Ikea; Glassware, Hearth & Hand, Target; runner, Hand sewn by friend, Peggy Stewart, fabric from Waverly/purchased at Walmart. Photo by Rachel Cuthbert Photography

Instant Pot Corned Beef

(adapted from a Striped Spatula recipe)

  • 1 Large onion, pulled and quartered

  • 4 garlic cloves, peeled and smashed with back of a knife

  • Package of pickling spices (that comes with the corned beef)

  • 2 cups water

  • 12 oz of beer (in my case, I just used 12 oz of beef broth because I didn’t have beer on hand)

  1. Combine onion, garlic cloves, pickling spices and water in the bottom of the Instant Pot. Place corned beef, fat side up on top of mixture. Cover with beer or in my case beef broth.

  2. Seal lid and set the unit to HIGH pressure for 85 minutes. Let pressure release naturally for 20 minutes, then manually release the remaining pressure.* Remove corned beef and place on a dish or a cutting board, spooning a bit of the cooking liquid over the top. Cover with foil to keep warm.

  3. Slice corned beef against the grain. Spoon a little bit of the reserved cooking liquid over the corned beef slices on your platter. Serve corned beef with mustard, horseradish, etc..

*Read some of Amanda at the Striped Spatula’s notes on venting the Instant Pot. For instance, she mentions that you should NOT use a towel while venting because it can damage the pot or cause a malfunction. This was news to me—I’ve used a pot holder while venting, but after reading this will take precaution not to cover the spout with a potholder or towel while releasing the steam.

Brown Sugar Mustard Glaze

via Rachel Ray

  • 1/3 cup dijon or country-style grainy mustard (I used grainy mustard, but you could even mix dijon and country style)

  • 1/4 cup brown sugar

  • 1/2 teaspoon black pepper

  • 1 teaspoon apple cider vinegar, red wine vinegar or plain water

Mix ingredients in a bowl. Set aside. Once meat is finished in Instant Pot, place it on a large piece of foil, fat side up, cover with glaze. Broil in oven on high for 2-3 minutes. Slice meat against the grain.

Nine for 2019 New Year's Resolutions

New Year’s Resolutions… Do you or don’t you?

untitled-169-Edit.jpg

Ugh!  I don’t even like typing “resolutions.”  To me, it’s synonymous with promises I will break.  If I have an obligation to work, to a friend, to an organization, I’m 100% all in and committed. But, obligations to myself are much easier to break. Thus, my dread of New Year’s resolutions. Much easier to not make them than to disappoint myself.   

And yet, there really is something important about fresh starts, goal setting, and keeping promises to ourselves. So, I’ve had to get creative—basically, to find ways around my worst self.  Truthfully, given to my worst inclinations, I am given to inertia.  I prefer a cup of coffee, a good book and a couch. And while those are fine things, I’m my most fulfilled when I’ve put in the hard work and treat myself with relaxation. It helps that I’m married to a mental health counselor—and someone who prioritizes goal setting and is more likely than me to meet his internal resolutions.  

Over the last two years, I’ve also appreciated reading/listening to books by Gretchin Rubin.  Just this past December, I started to read her flagship book that launched a website, podcast and many other books, The Happiness Project, and I love it.  I actually listened to her follow up books, Happier at Home and The Four Tendencies first.  

I resonate with her system. Clearly, she’s a very accomplished (Yale Law Review, clerked for Sandra Day O’Connor), but doesn’t make you feel like you’re not good enough.  Her message is that we can make life changes by incrementally (in her case, month by month) looking at areas of our lives that we want to improve.  These changes ultimately improve our day to day life. I haven’t systematically followed her rules (yet), but I’ve implemented a few and it has shifted that way I look at things.  I’ve realized that for many years I have felt stuck.  But as I’ve really examined my own personality, temperament, and strengths/weaknesses, I am working hard to work around my weaknesses and play to my strengths.  

Happiness is neither virtue nor pleasure nor this thing nor that, but simply growth. We are happy when we are growing.
— William Butler Yeats quoted in The Happiness Project (p.66)

It was eye opening listening to her book, The Four Tendencies, to realize that of the four (Upholder, Questioner, Rebel, Obliger), I’m an obliger.  As an obliger, my tendency is to fulfill outward obligations to people which makes me a good employer and friend, but I really struggle to meet my own inner expectations.  I spend my energy taking care of needs, but often fail myself by not meeting said expectations.  For years, I thought I was just unmotivated. It was helpful to recognize that it’s not an issue of laziness, but instead I work best with deadlines and —as she calls it, outer accountability.  

Honestly, this annoys me about myself.  I want to be an upholder with the mantra: “discipline is my freedom,” not the person who struggles with inner accountability. But all the gnashing of teeth in the world isn’t going to change how I’m hardwired. Instead of beating myself up, I’m actively looking for ways to create accountability.  Interestingly, I surround myself with upholders—I think this is one form of built in accountability. It’s important to spend the most time with people who inspire and encourage us to be our best selves. 

A few other ways I hold myself accountable include: For little things, like early prep for dinner or washing the dishes before I go to bed, I often ask myself how future self will feel. I’m old enough now (ha!)to know the pain of waking up to a sink full of dirty dishes. I also love learning & good conversation—so in particular, when I’m cooking in the kitchen or folding laundry, etc… I make sure that I stay motivated by listening to good podcasts, audio books or catching up on phone calls.

 For bigger tasks, such as creating my own website—I have had to invest more money and external accountability.  Bottom line: I need real skin in the game.  So I hired a graphic designer to help me craft my brand & I work with a recent marketing grad on some of my social media & scheduling.  Some would see this as a big expense, but for me it has been a good investment & a vehicle to fulfilling personal goals.

Inspired by the Happiness Podcast, here are my 9 Resolutions for 2019: 

1.     Exercise: more walking (track my steps), weight training, and stretching. I really need to work on my posture—I have a very bad habit of slouching and not holding my shoulders back. And big surprise, it’s not improving as I get older. So I’m dedicating 2019 to getting serious about this particular issue.

2.     Step up on the blog—weekly post, monthly email, research the business side of the website. Part of this includes making a concerted effort to write daily. Ideally, 1.5 hr increments. I can overthink projects and because of this really procrastinate. But there is something to setting a timer and breaking tasks into bite size pieces that makes things far less overwhelming. And again, once I get moving, push past my fear and inertia, the words come. I’ve been writing this particular post for 2 weeks. Sounds ridiculous I know. But I’ve been adding and subtracting content, and this is more personal to me than a post about Christmas trees, recipes or decorating. Slowly but surely, this post has taken shape.

3.     Decreasing time on social media—only 2 x’s a day. This is to review Instagram, catch up on blogs, and read news. Like many of us, I have a love hate with social media.  I like keeping up with people’s lives, and I like learning from the various talented bloggers online (one of the reasons I started my own website is because I’ve learned so much from other women who’ve made careers writing about books they read, time management strategies, menu planning, and home décor). But it can also be an exhausting, comparison game, time suck.  Alas, how do we take the good & leave the bad… 

4.     Memory books—pretty behind on this one.  Like 12 years of family photos all stored online behind.  My pipe dream goal is to make one scrapbook a month for the next year.  Probably unrealistic, but a girl can dream. : )

5.    Spend less money on incidentals, bring less into the house. Another personality trait I’ve had to come to terms with… I’m a spender. Some people under spend and have to learn to treat themselves & be more generous. I have to learn to spend less & more wisely. One budgeting tool that Brock and I have loved is the budgeting app: YNAB, short for You Need a Budget. It’s been a game changer for us—we do pay a yearly fee, but it’s been super helpful tracking every dollar and helping us save more. Of course, there’s always room for improvement. Thus I’m trying to decrease nickel & dime purchases. : )

6. Continuing to organize, purge and declutter the house. This goal is tied to #5. I started this process when the now very popular book, The Life Changing Magic of Tidying Up by Marie Kondo burst on the scene 4 years ago. There’s a reason it has nearly 14,000 4.5 star reviews on Amazon and she has a new series on Netflix. Her steps work. There are a few weird things that I don’t subscribe to—basically treating inanimate objects as living things—but I do love looking at the items I own, or am considering purchasing, and asking the question, “does this spark joy?” There is something to having less but loving each item instead of being overwhelmed and frustrated by the endless organization of mediocre stuff.

7. Saving more for travel & bigger ticket items. Again, directly correlated to goals 5 & 6. Our oldest child is nearly 13, and the way we see it, we have 5 summers left with him living full time at our house. Big fat sigh. I want to use this time wisely. My goal—spend time & money on things that really matter.

8. Go to bed earlier (by 10:30, up early, up by 6 a.m.). I am hoping the Brock is the “wind beneath my wings” in this area. I’m a late night girl, and he loves early mornings. I’m trying to go to bed with him, read for a bit, and then get up earlier. This has been hit or miss so far.

9. Consistent quiet time with the Lord each morning (this is tied to going to bed earlier and getting up earlier).  The joy of the Lord truly is my strength.  But I can’t experience that if I’m not spending good time with Him.  My husband, Brock, is tapped into this—as a human being who counsels other humans, he can’t function before he spends a lot of time reading the Bible, devotionals, reflecting, and praying.  Often, I find myself riding his spiritual coat tails and coasting along until I find myself worn out & irritated with everyone in my general vicinity.  Truth is that on my own, I don’t have enough love, patience or strength.  

My true source is Jesus and his Word.  When I open my Bible, turn on worship music, spend time in prayer—this is the place I am truly encouraged & nourished.  I simply don’t have it on my own.  He, the sovereign Lord and king, the giver of life and peace, who tells us to come to the living water and drink from it (John 7:37-39, paraphrase) has to be my main source.  

Finally, because Brock counsels college students, he often discusses goal setting & such. So I asked him for a bit of feedback on how he encourages people to fulfill goals. Here’s what he had to say: “Why most people have a love/hate with resolutions is that we love newness, it’s the hope that things are going to change.  Which is true—new job, new love, new year… it’s possibility for change.  But—truth is that it has too much emphasis on external locus of control.  

Change comes from inside… Most resolutions fail because they are pipe dream or a magic wand that you want to wave over your life and have instant change. Change happens through hard work, setting objectives to bringing about the goal, by accountability.” 

Why most people have a love/hate with resolutions is that we love newness, it’s the hope that things are going to change.  Which is true—new job, new love, new year… it’s possibility for change.  But—truth is that it has too much emphasis on external locus of control.  

Change comes from inside… Most resolutions fail because they are pipe dream or a magic wand that you want to wave over your life and have instant change. Change happens through hard work, setting objectives to bringing about the goal, by accountability.  

Naturally, I asked him what he suggests people do to fulfill there resolutions. “Pretend I’m a client in your office, what would you tell me?”

  • Review your resolutions/goals every day

  • Hang them up where I can see them

  • Focus on how you think & feel and be if I accomplish them.

  • Journaling about something that didn’t want to do, but I did do. Journal & reflect on things that went well.  Not just the hard things.   

So that’s it for the moment. Would love to hear some of your New Years resolution and ways you plan on meeting them! Cheers to 2019 & greater growth!


Christmas in the Community with Tree Classics


“For it is in giving that we receive.”
― St. Francis of Assisi

As most of you know, I love decorating for the holidays and as brand spokesperson for Tree Classics, of course, I have many opportunities! I have easily set up a dozen tree this year alone. But, while it’s fun decorating our home for the holidays, the most life giving opportunities are when I get to gift trees. So I was pleased to join Tree Classics annual Christmas in the Community campaign where various bloggers gift trees to their favorite community organizations.

Most recently, Tree Classics donated a 7.5’ Lake Forest Fir Snap Tree, tree skirt and ornaments to the SPARC program (a local non-profit that provides programs and support for children and adults with developmental disabilities and their families) at our children’s charter school, Will Carleton Academy. And I can’t say enough kind words for how warmly the students and staff welcomed me. They were so excited to decorate their new tree! We spent a morning listening to holiday music, putting ribbon & ornaments on trees, and drinking hot cocoa.

SPARC student, Sam, decorating the tree. Photography by Rachel Cuthbert Photography.

SPARC student, Sam, decorating the tree. Photography by Rachel Cuthbert Photography.

Making bows and stringing ornaments.

Making bows and stringing ornaments.

You can imagine my delight when they invited me to see their fully decorated tree and to share more popcorn and hot chocolate. And they made me a lovely salt dough ornament tree along with thank you cards. Very thoughtful! A big thank you to Tree Classics, and Tammy, Char, and Paul with SPARC, and Colleen Vogt the Director of Will Carleton Academy for welcoming me into their community. Merry Christmas!

Hand crafted Salt dough tree; fully decorated Lake Forest Fir Snap Tree.

Holiday 2018 Wrap Up!

The Lutz living room all dressed up for the holidays. Majestic Blue Spruce tree, Classic Fraser Fir garland and wreath. Photography by Rachel Cuthbert Photography

The Lutz living room all dressed up for the holidays. Majestic Blue Spruce tree, Classic Fraser Fir garland and wreath. Photography by Rachel Cuthbert Photography

I’ve been decking all sorts of halls this year… Here are a few of my favorites!

This year I opted for a more narrow tree in my living room, the Majestic Blue Spruce decorated with mercury glass and gold ornaments and topped with gold and velvet green ribbon from Hobby Lobby. For the our fireplace and door, I used the Classic Fraser Fir garland and wreath from Tree Classics—both are battery operated—and honestly, I’ve had them up for over a month and haven’t had to change the batteries.

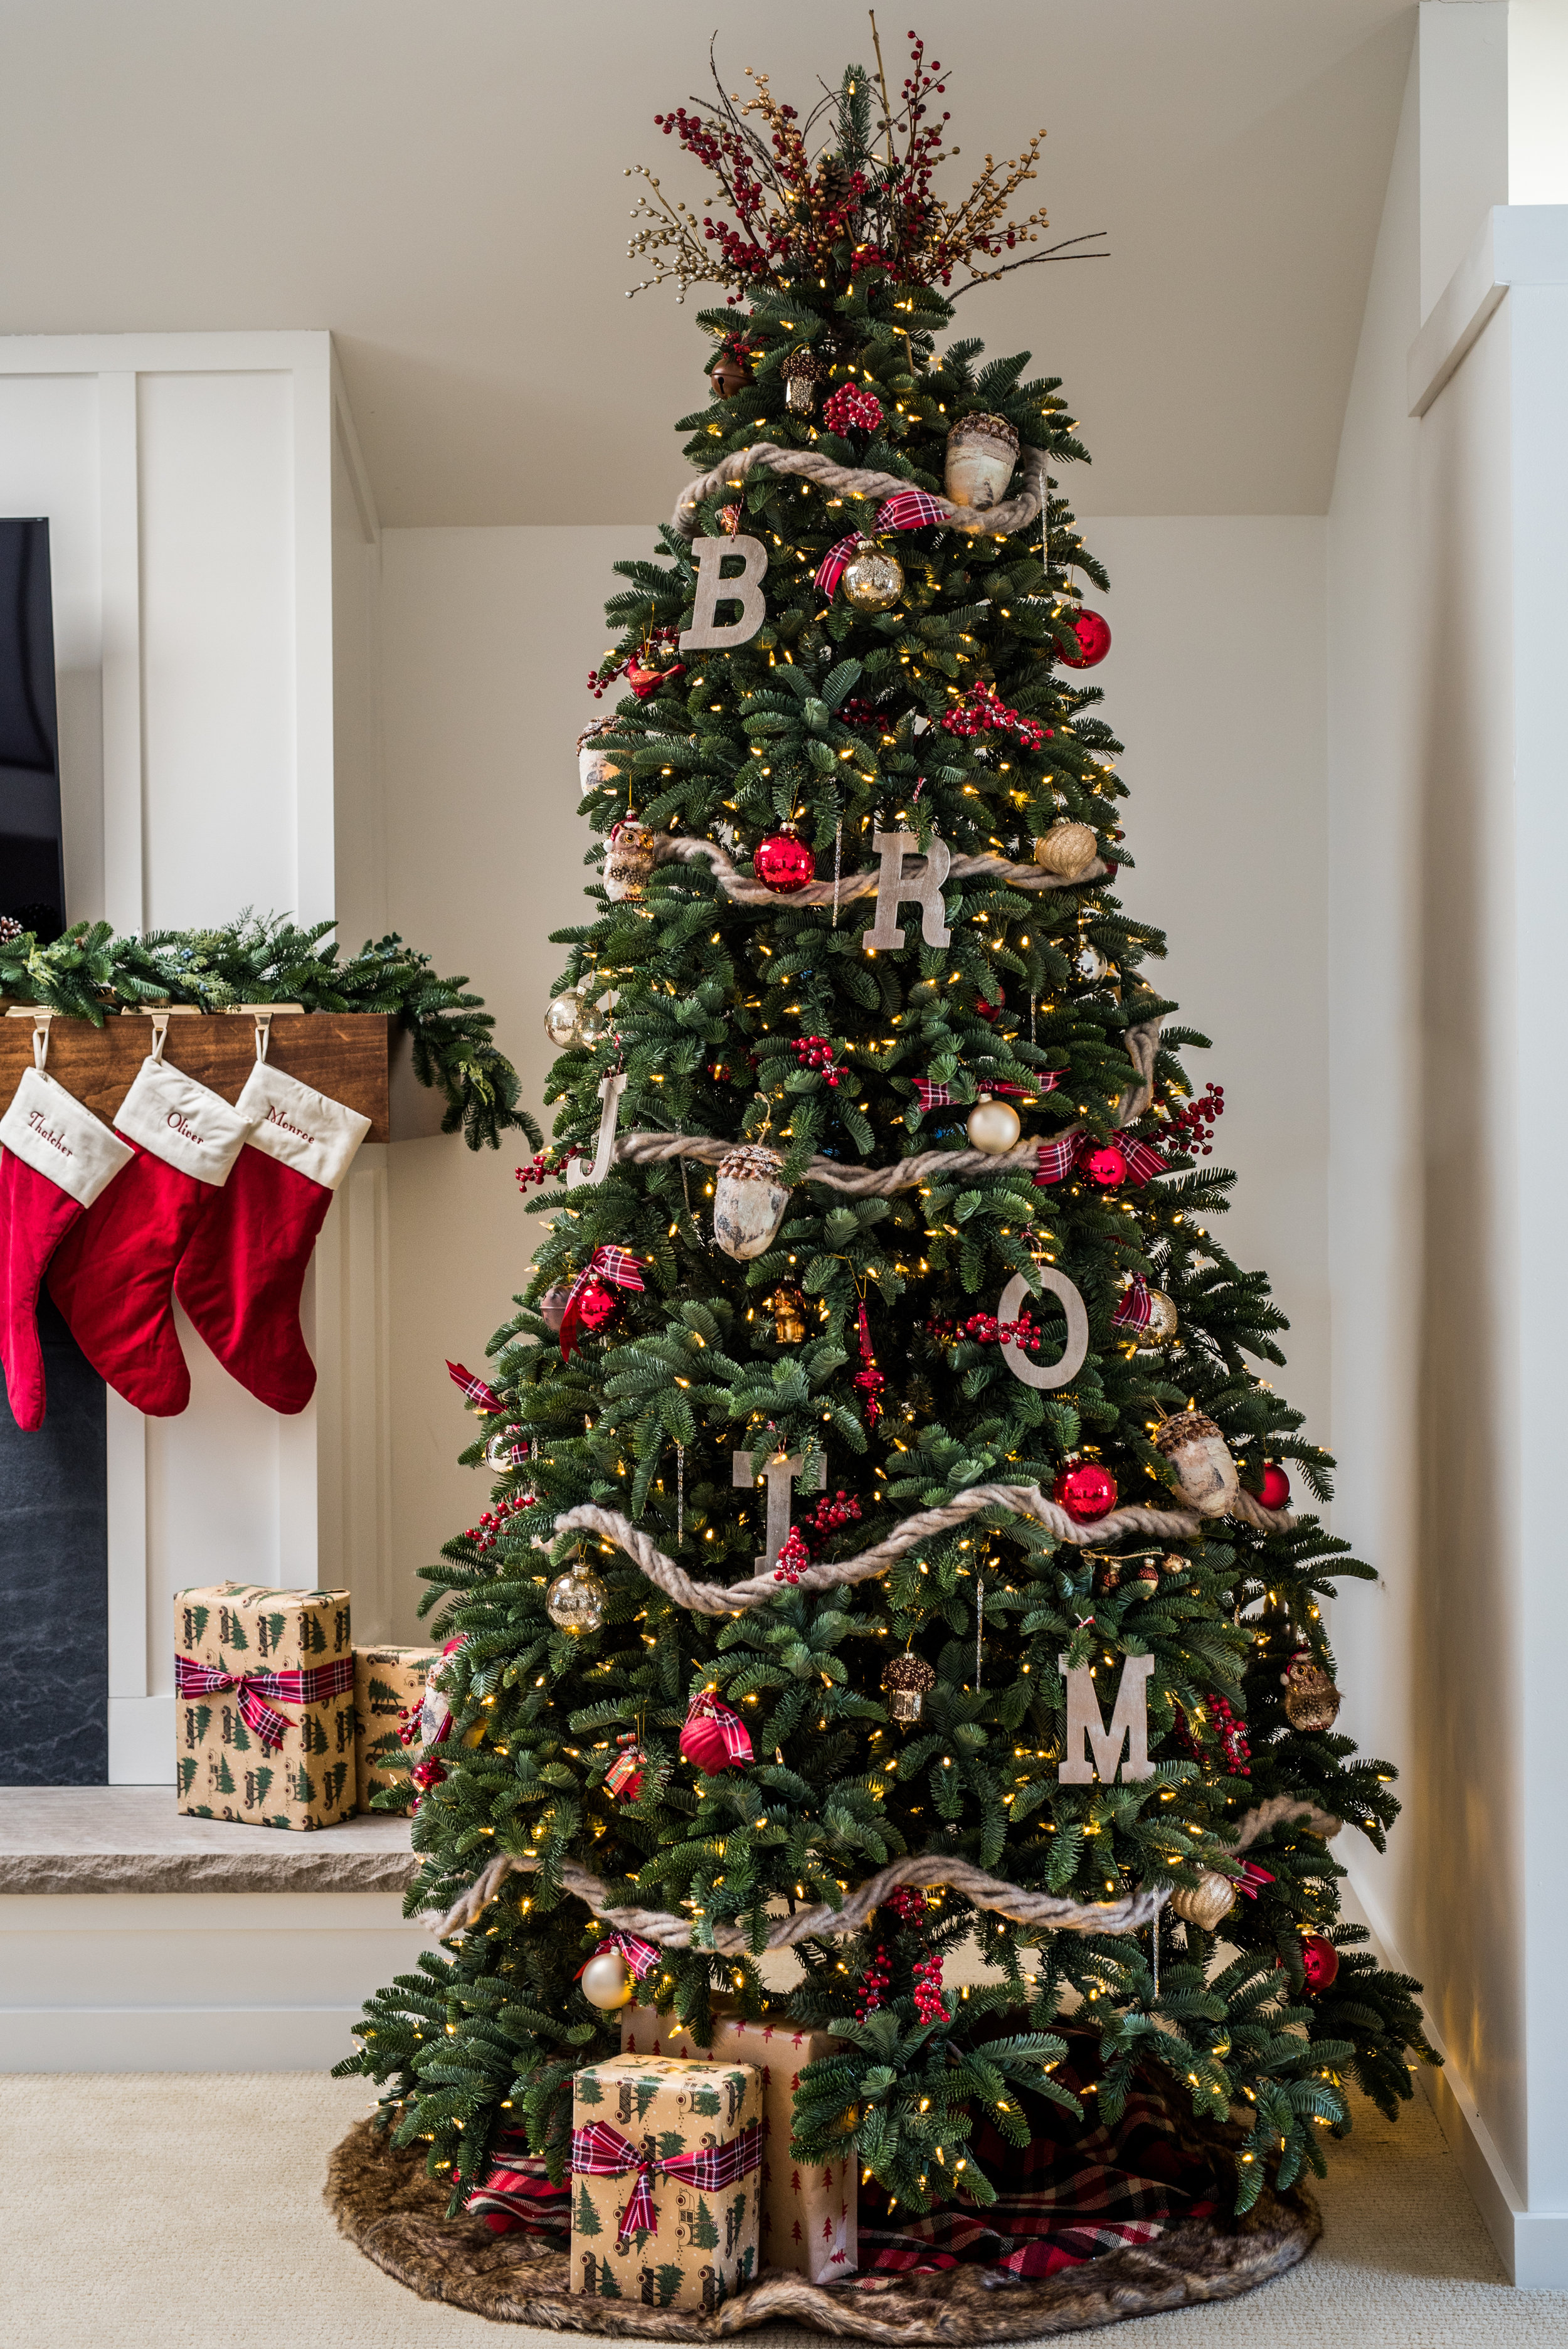
Next, is my friend and photographer, Rachel’ Cuthbert’s, Christmas tree. Her newly renovated family room has vaulted ceilings which is perfect for a 9 foot tree. We chose a Deluxe Noble Fir—this is one of my favorites with full green, down swept branches. I have used the 7.5’ version of this tree the last few Christmases and love it. I pulled in Tree Classics Woodland Collection, letter ornaments for each member of the Cuthbert family that I found in the Target Dollar bins (I often find some great buys there), berry picks from Tree Classics to add a bit of color and texture. I also like using berry picks for tree toppers as well. We finished it off with bulky yarn that we turned into garland. I found super thick arm knitting yarn at Hobby Lobby and twisted it into garland—it reminds me of a cozy sweater!

Finally, in our family room, I decorated a Flocked Alpine Spruce. Because of the wood paneling in this room, I like to brighten the space and the flocked tree both brightens and adds to a woodsy feel to the room. I also used the new Woodland Ornament collection and red berry picks for this tree. I pulled in gingham wired ribbon from Michaels and topped it with a bow. I love seeing Rachel’s tree and our family room tree next to each other. We both used the Woodland ornaments, but look completely different because the trees and the garland vs. the ribbon. Let me know your favorite!

A few tips from the tree decorating trade:

  1. If you are using an artificial tree, take time to fluff the branches. I know it’s time consuming, but it makes such a difference. Especially towards the back of the tree, branches should be fluffed like a peacock feather. This creates a fuller tree and conceals the trunk.

  2. If you decide to use ribbon, wire the ribbon in first. Here’s a link to a step by step video for adding ribbon to trees.

  3. Vary ornament sizes. I try to decorate with 3 sizes—small, medium, and large. Large ornaments add that wow factor to the tree so don’t be afraid to use them. In fact, put them on after you add ribbon to the tree. Step back from the tree and visually break it into six sections. Place the larger ornaments accordingly, then add medium ornaments and finally smaller ornaments.

  4. Layer detail onto the tree—tree picks—such as the berries I used in Rachel’s tree and my flocked tree, gold leaf picks that I used in my living room tree, etc…, a tree topper, garland, ribbon, and a finally a tree skirts.

  5. Finally, I am often asked, how do you create a cohesive, styled tree if you’re using a variety of mismatched ornaments? My suggestion: pick at least 3 things to tie everything together—a tree topper, garland or ribbon, and a tree skirt, then you can pull in all of your family favorites and heirloom ornaments. Finishing off with coordinating wrapping paper for gifts is another simple way to create a tree that looks and feels coordinated.

That’s it for holiday decor 2018! Would love to hear what’s your favorite of the three trees, and if you have any holiday decorating tips or questions. Wishing you the merriest of Christmases!

Channeling Your Inner Holiday Hostess

This post is for my life long best friend and partner in crime, Monica.  She messaged me a few weeks ago needing some recipes for an upcoming holiday party she was hosting.  She remembered a thinly sliced beef tenderloin served for my 40th birthday celebration and requested that recipe along with a few others.

Entertaining doesn’t have to be stressful!  After you’ve created your guest list & type of event you plan to host, plan your menu. For this particularly party, they are hosting work friends for appetizers and drinks.  Here are a few holiday hosting tips and recipes:

 1.    Don’t make everything from scratch.

Pick a few recipes to make and then assemble the rest.  

Food to assemble: Cheese platter with fruit and nuts.  Find your favorite platter & fill with 3+ cheeses, an array of nuts, seasonal fruit (for Christmas I think honey crisp apples, pomegranates, clementines and small berries fit the bill.  A good cheddar, soft cheese (brie or goat cheese), or a blue cheese if you like something strong

For sweet treats, go to the bakery for desserts. When I lived in Cleveland I had a few favorites that I frequented.  Fragapane’s for cannoli and cassata cakeDick’s Bakery in Berea for Date and Nut cake, and A Cookie and a Cupcake for special events, to name a few.  

Also, bowls of your favorite chocolates, nuts, and such go a long way.  Trader Joe’s and Costco are great sources for delicious, affordable nuts and chocolates.  A few of my favorites from TJ’s: Turbinado sugar dark chocolate almonds, dark chocolate covered peanut butter cups, chocolate covered salted graham crackers. From Costco: Sanders dark chocolate covered salted caramels.

Finally, don’t be afraid to say yes to guests that offer to bring something—whether it’s a bottle of wine, an appetizer or plate of cookies, say yes to help!  

The Holiday table decked with greens, bits of linen and velvet and my grandma’s pizzelles

2.    Choose a main dish and appetizers that feel special.  

My very favorite is roasted beef tenderloin sliced thin, served with horseradish, gourmet mustards, and a variety of rolls, good cheese and crusty bread.  

Here’s how to prep the tenderloin, according to my friend Stephanie. I promise, she’s the master.

Roasted Beef Tenderloin

Trim and tie the tenderloin and the season with Montreal steak seasoning blend by McCormickand Flavor by Penzey’s. Sear in olive oil until nicely browned and then pat with butter and roast at 475 until med rare. (Side note from Jen: I recommend investing in a good thermometer.  This was never clearer to me than this Thanksgiving when neither my mom or I could find a working meat thermometer. Here’s the thermometer I have on my Christmas list—I’ve read a lot of good reviews about it, and hopefully Santa is taking note.) I then freeze until almost frozen—about 3 hours. Remove string. Cut crosswise into very thin slices. (Put between parchment to store if doing the day before.). To serve, cover large platter with arugula or watercress and the slices of beef. Drizzle with a little oil, lemon juice, Parmesan shavings and serve with rolls or baguette slices and the sauce detailed below.

Mustard Horseradish sauce

¾  Cup good mayo (I prefer Helman’s)

1 ½ Tablespoons Dijon mustard

1 Tablespoon Whole grain mustard

½ Tablespoon Prepared horseradish

2 Tablespoons Sour cream

Kosher salt to taste

Side note: challenge yourself by learning from people who are better cooks than you.  When I moved to Michigan 7 years ago, I felt pretty confident in my cooking ability.  In my twenties, I even had a side hustle catering. But when I moved, I connected with people who took cooking to the next level, and Stephanie is one of those people.  I had made roast tenderloin for years and it was delicious, but hers was next level.  She took the time to properly trim and tie her meat before searing and roasting which creates a more even heat distribution.  I learned how important it was to quickly sear the meat and lock in flavors. Thanks, Steph! : )

Glazed Ham  

2019jenchristmasparty(14of27).jpg

This is one of my favorites for feeding a crowd.  Ham seems fancy, it’s plentiful and not only is it a festive addition to any table, it’s also very affordable. Skip the glaze packet that come with the ham—making your own glaze is quick and so much better. My go to glaze is from the cookbook, Hungry, Feeding Men and Boys by Lucinda Scala Quinn.

Side note: this particular cookbook is a favorite.  Lucinda Scala Quinn was the food director for Martha Stewart for years and hosted her own cooking show.  She has also raised 3 boys.  I resonate with her approach to cooking, entertaining and feeding her family.  She loves gathering her family & friends, and her recipes are down to earth and achievable. Her Insta feed—in particular her stories where she cooks—are great!  

2019jenchristmasparty(13of27).jpg

Roasted Shrimp Cocktail

My favorite way to prep shrimp—toss in whatever spices you prefer and roast it for 8-10 minutes in the oven (until shrimp are pink and firm to touch).  Also learned this from Ina Garten.  It’s quick, simple and fool proof.  Sometimes I do this the day before an event and keep it chilled in the fridge. 

A good dip - Artichoke and spinach is a crowd pleaser, for good reason.  It’s so delicious and feels warm and cozy on a winter night. Honestly, I’ve been known to buy the Terre Fina brand at Costco, sprinkle with parmesan, warm in the oven and serve with crackers or pretzel thins. Or some type of veggie dip (homemade hummus, Sundried tomato dip, or a favorite that pairs well with veggies.    

Drinks: You can keep it simple with sparkling water, wine & favorite beer.  If you’re feeling fancy, serve a signature drink. 

Here’s a favorite that my friend, Jaminda, makes during the holidays:

Eggnog Martinis

Two parts vodka, 1 part Eggnog, 1/2 part Buttershots (flavored liquor).  Shake that and then pour into glasses.  Add a splash of cream soda at the end.  This gives it some fizz.  So good! 

3.   Employ music, candles and simple décor to set the tone. 

 I know using the word simple sounds a bit ridiculous coming from the woman who decorates Christmas trees for a living, but you really can keep it simple and beautiful at the same time.  

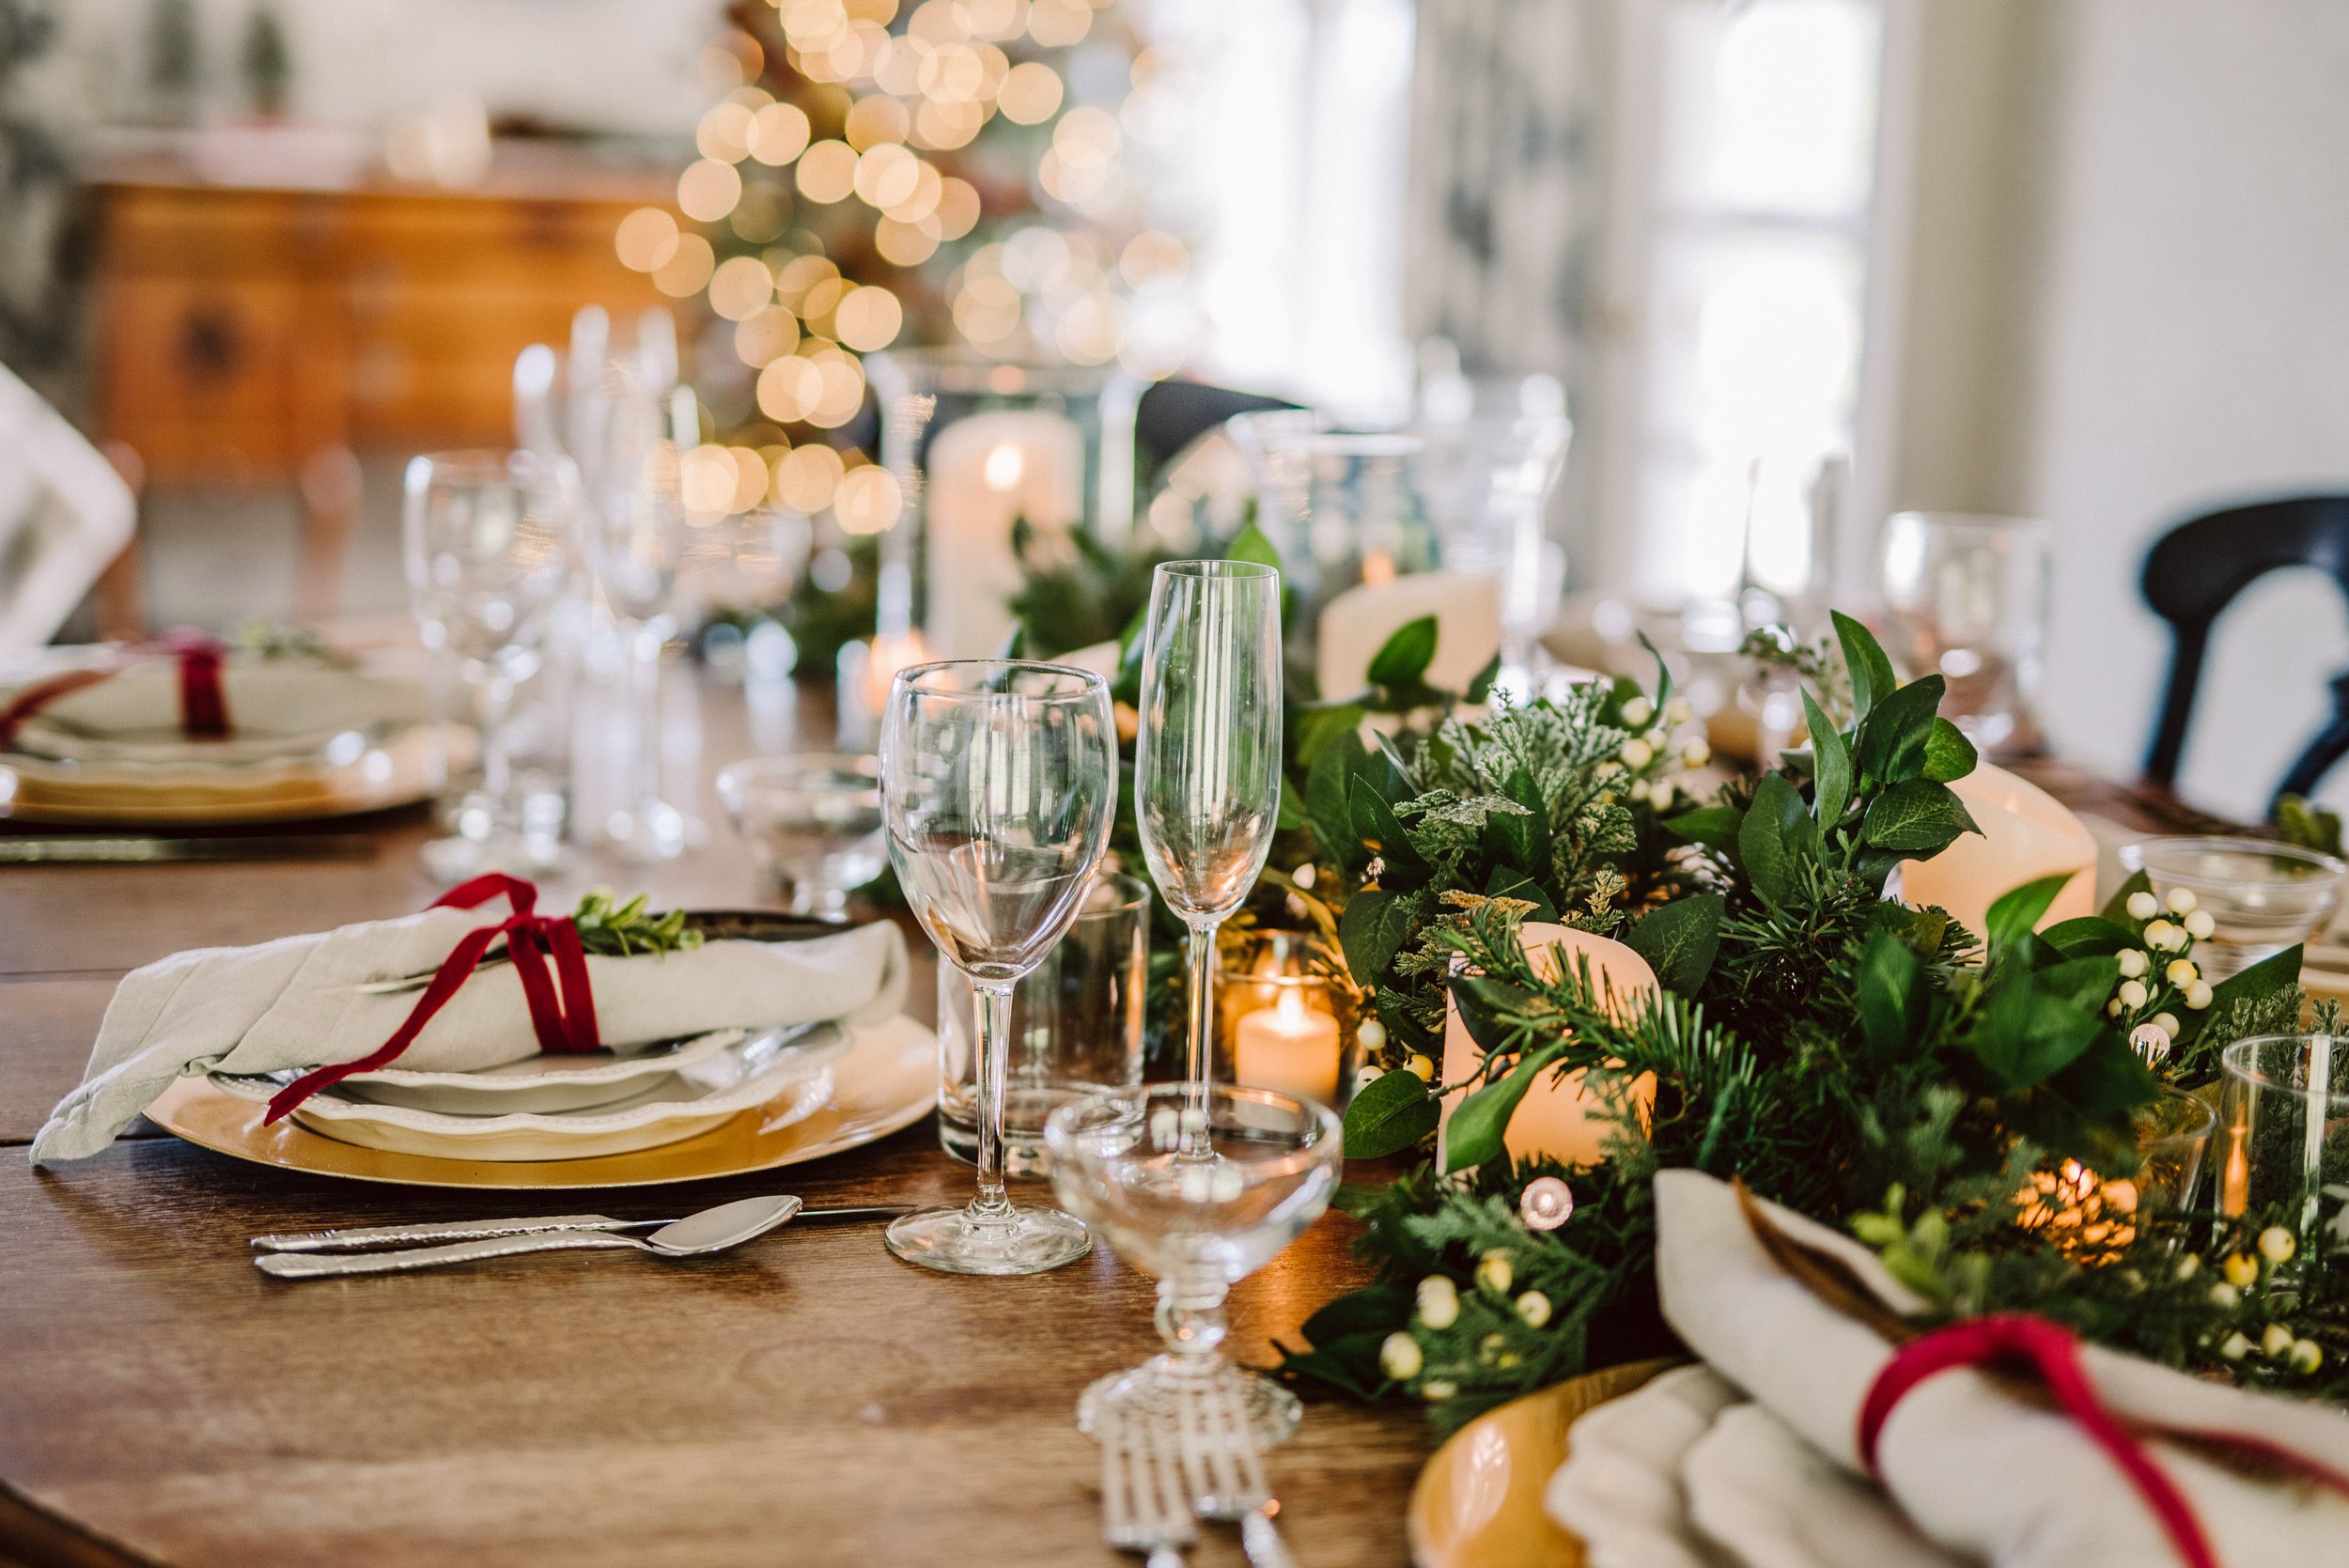
Candles and greens go a long way. Tea lights, pine roping or clipping from a pine tree in the back yard are perfect accents on the holiday table. Before guests come, turn on the holiday music, have drinks ready to go, and light the candles.  Easy peasy!

Do you have any go to recipes for holiday parties? I would love to hear from you. Happy hosting & happy holidays!

Home for the Holidays with Tree Classics

Family room mantle decked in Christmas Morning Frost garland. Photography by Rachel Cuthbert Photography.

Family room mantle decked in Christmas Morning Frost garland. Photography by Rachel Cuthbert Photography.

Welcome!  I’m excited to be kicking off Tree Classics Home for the Holidays blog tour.  One of my favorite things about being the brand spokesperson for Tree Classics is decorating for Christmas early, previewing some of their new product, and “window shopping” other bloggers holiday decor! Today I’m sharing with you some our favorite holiday traditions along with our family room decked in holiday finest and a few tips for decorating like a pro.   

Perhaps it’s cliché, but Christmas really is the most wonderful time of the year.  It’s as if the world takes pause, for even a half second to celebrate what is good and beautiful and true.  We do this by decorating, baking and cooking, gathering those we love and hold dear, sharing meals together, and gifting our time and resources.  And over time these activities create indelible traditions and memories.  

A few favorite Lutz family traditions include (in no particular order):

  • Wrapping and reading 25 picture books to celebrate advent: December 1-25th

  • Decorating the house & making it Christmas cozy (my daughter loves this!)

  • Christmas music!!! Again, a bit cheesy, but it makes me so happy!

  • Pulling out special holiday mugs—especially for hot chocolate (my 9 year old twins have already started using theirs)

  • Baking and gifting cookies & coffee (my husband roasts his own coffee and I bake)

  • A special day of lunch & shopping with the kids (they exchange names and we take them to the city, in our case, Ann Arbor, to shop)

  • Wrapping gifts while watching our favorite holiday movies (White Christmas, It’s a Wonderful Life, Elf… to name a few)

  • Gathering with friends and family.  We live in a small community & my husband works at a college 7 minutes from our house. Our work, school and church life all intertwine (think Mayberry meets Stars Hollow), and no exaggerating, for two weeks in December, we have at least 4 events a week.  Of course, it’s a bit exhausting to fit in all this celebration along with Christmas prep.  But then I ask myself, what would it look like if we didn’t celebrate?  If we didn’t take pause each December and truly celebrate. “A thrill of hope the weary world rejoices…” O Holy Night, composed by Adolphe Adam, 1847, text by Placide Cappeau

christmas18-242.jpg

On to decorating!  I began “decking the halls” in our family room. Tree Classics has fun new product this year—Christmas Morning Frost Wreath and Garland set as well as new ornaments and tree skirts.  Our family room has a rustic feel with knotty pine unfinished planked walls, and I immediately knew that woodland ornaments along with my Flocked Alpine Spruce tree, and Christmas Morning Frost wreath and garland set would create a beautiful winter woodland landscape.  

A few quick designer tips… Really fluff your tree, garland and wreaths.  I’ve linked to a short video of me going through the steps of fluffing a tree. The beauty of pre-lit Tree Classics greens is that they look full and real, and you can adjust the branches to look fuller and fit ornaments (we call it fluffing). In the inside of your tree, fill the holes and blank space by moving your branches upward to mimic a peacock feather.  For exterior branches, look at the picture of the tree online and shape your branches up or down accordingly. I promise, you will be much happier with the end product if you take the time to fluff your branches.  

Fluff your tree branches for the best shape & fullness!

Fluff your tree branches for the best shape & fullness!

Other notes, I always keep twine, green floral wire, green pipe cleaners, wire cutters, and command strips on hand.  To get a really designer look, I will wire ornaments to branches—so that they hang perfect.  You have more control with a wired ornament—you can hang lower or higher. Command strip are amazing for hanging holiday pictures, wreaths, and garland, but you do have to have the right surfaces.  Command strips don’t work as well on uneven surfaces such as the wood in my family room. 

I added the lovely Woodlands Collection ornaments to the tree.  I really like the detail in these ornaments—the owl has real feathers & the cardinal is beautiful.  The red berry tree picks add color and texture—they even have a bit of crystal sanding to mimic snow & add sparkle. I often add ribbon and, for this tree, added gingham ribbon that I purchased at Michael’s earlier in the year.  

Two of my favorites from the collections—the strand of acorns and the owl with real feathers. Love the attention to detail!

Two of my favorites from the collections—the strand of acorns and the owl with real feathers. Love the attention to detail!

For the tree skirt, I chose Tree Classic’s Rustic Plaid Faux fur tree skirt. Seriously love this!  We live in Michigan, and I love anything that looks & feels cozy during the winter months.  Sort of related side note: I just ordered winter boots with shearling lining and am currently looking for the warmest winter coat I can find—faux fur trim would be a bonus! If anyone has favorite WARM winter coats, let me know.   

christmas18-200.jpg
christmas18-154.jpg

To tie together the tree and give a cohesive look, I try to use wrapping paper and ribbon that coordinates with the tree.  Home Goods and Ikea are two of my favorite places to shop for these items.  In this picture, both wrapping papers are from Ikea. 

While I used some new product for the woodlands collection for the tree, for my fireplace and piano—I mixed and matched product this year.  Tree Classics has a rustic wreath and garland set, but I wanted to carry the flocked look over to my mantle.  Again, I just really like how the flocked brightens up my wood paneling. Often, I will swag my garland, but this year decided to place the garland on the mantle.  It’s so rich and full with red and silver ornaments, berries and pinecones that I didn’t need much extra décor.  I found a fun mirror at one of my favorite local specialty shops, MaryBeth’s.  There is very little room between the ceiling beams and the mantle, and this distressed, narrow mirror was a perfect addition.  Hanging it was a bit tricky, but gratefully, I had wired twine on hand, and it seems to be hung securely.  

The stockings were hung by the chimney with care… And can I say, I’m so happy I found that mirror! I love this particular shot. : )

The stockings were hung by the chimney with care… And can I say, I’m so happy I found that mirror! I love this particular shot. : )

For the piano, I placed the garland and added candlestick holders that I found last year at a resale shop, along with the lamp that usually sits at the piano. Finally, I hung the wreath above the piano—so far I haven’t added ribbon, but may still add one.   

christmas18-144.jpg
Christmas Morning Frost wreath from Tree Classics

And that’s it—my tips for creating an inviting home for the holidays!  Check out my fellow bloggers who will also share their décor and favorite holiday traditions.  And please, share your traditions as well and let me know if I can answer any tree questions. 

Home For the Holidays participating bloggers

Nov 12: Jessica of Domicile 37
Nov 13: Linda of The Home I Create
Nov 14: Jen Lutz of Tree Classics/Jennifer Lutz at Home
Nov 15: Caroline of Caroline Bivens Designs

Nov 16: Haley of At Home with Haley

Nov 17: Kathy of Up to Date Interiors
Nov 18: Heidi of Home by Heidi
Nov 19: Jennifer of The Ranch Uncommon

Nov 20: Shirley of Housepitality Designs

Nov 21: Monica of Monica Wants It
Nov 22: Cindy of Edith & Evelyn Vintage

Nov 23: Ashlee of Ashlee and Her Tribe

Nov 24: Leah of Life as Leah

Treasured Celebrations

oct18(13of40).jpg

This fall my husband and I hosted friends for our 20th college reunion, a celebration of some of my most treasured, life changing friendships.  Needless to say, when Tree Classics invited me to kick-off their Treasured Celebrations blog hop, I knew that this was exactly what I would share with you as we head into Thanksgiving… the beauty of gathering friends and creating memories, along with approachable menus for feeding a crowd and simple décor ideas.

Décor: Front door & table decor

It doesn’t have to be complicated.  For real! I’m laughing a bit as I type this because prep for our Homecoming gathering was a little crazy & complicated. But, that’s because we did a full remodel on our main bath this summer, our master bath is currently gutted and one month out from friends arriving, we started a DIY update of our basement bath. Ha! I will share these bathroom remodels in future posts, but let’s just say, I wouldn’t recommend this level of home improvement this close to a major event.  However, it was a huge impetus to keep moving and get work done. And miraculously, with much thanks to my husband, a handful of college students, and local friends who pitched in last minute, we got most of it done.  

My real recommendation is that you add a few seasonal touches to the house: some fresh flowers, candles, and music right before guests arrive. On the front door, this is one of my favorite wreaths from Tree Classics because it’s beautiful for fall, Thanksgiving or Christmas. Countryside Wreath

Fluffing Tree Classics Countryside Wreath

Fluffing Tree Classics Countryside Wreath

On the inside, I hung this Classic Fraser Fir Wreath.  Again, this is another wreath that works well from fall to Christmas. I added this Thankful sign that a dear friend recently gave me. I love little reminders sprinkled about the house, and truly, I am thankful.  Thankful for decades of friendship, and the bounty that comes from gathering with those we love and cherish.     

Classic Fraser Fir Wreath from Tree Classics. I added the Thankful sign from Hobby Lobby.

Classic Fraser Fir Wreath from Tree Classics. I added the Thankful sign from Hobby Lobby.

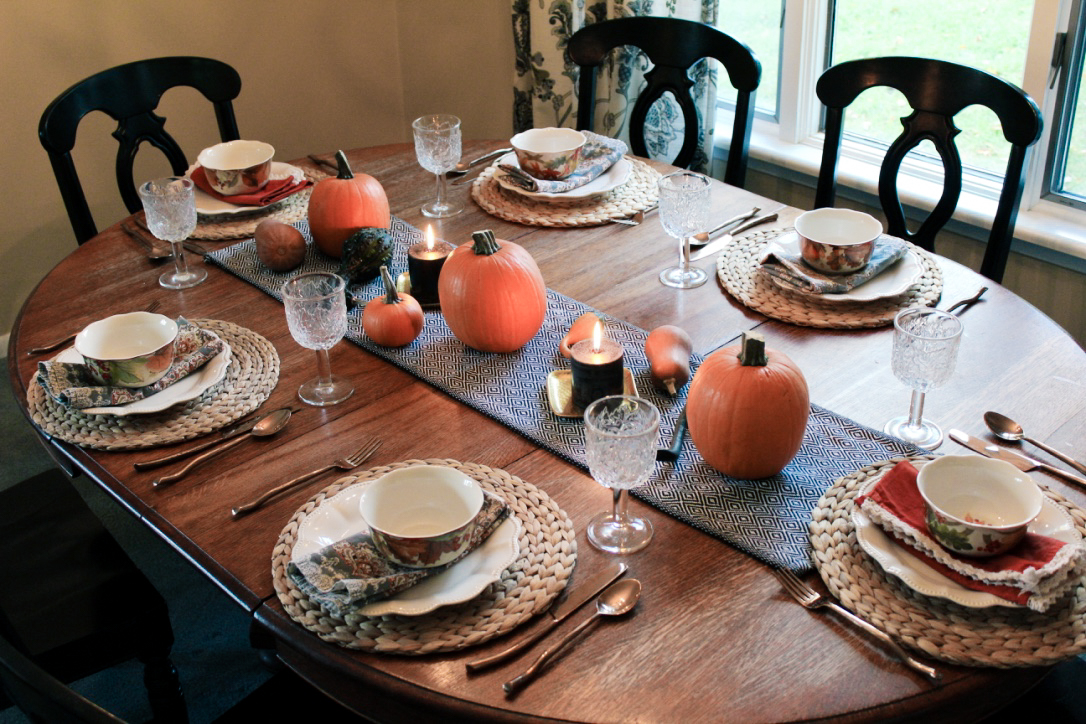
For table décor and food, I often employ a few strategies. First, I look to the season.  It’s fall so I pull in the rich colors of the season, thus pumpkins, squash and gourds.  Also, I often buy flowers at my local Kroger—they have great prices for roses and sometimes I even find great prices on discounted flowers. Second, I shop my house. After years of party planning and hosting, I’ve collected quite an array of cloth napkins.  I’ve even made some of my own as well.  And I layer my dining table with a runner, seasonal décor, placemats and mix & match dishes.  

Fall harvest tablescape—table runner & placemats from Ikea, plates from Pioneer Woman (Walmart), print napkins and silverware from World Market, bowls and burnt orange napkins from HomeGoods.

Fall harvest tablescape—table runner & placemats from Ikea, plates from Pioneer Woman (Walmart), print napkins and silverware from World Market, bowls and burnt orange napkins from HomeGoods.

thumb_IMG_7609_1024.jpg
Dining table as it gets darker outside. Loving the pillar candles from Hearth and Home collection at Target.

Dining table as it gets darker outside. Loving the pillar candles from Hearth and Home collection at Target.

Food fit for a crowd

We host friends and family. A lot.  Often, I am quickly throwing together a dinner party, but when I hatched the idea to invite a dozen friends to visit for Homecoming weekend, I knew I needed to be organized in planning—many friends were coming from a distance (East Coast, West Coast, and even Europe!). I couldn’t potluck this shindig.  

Though I did enlist help from a close friend who also happens to be Italian and a fantastic cook.  No joke, she made homemade lasagna (noodles and everything) and traveled 2 hours with them on ice along along with a delicious Italian Cassata cake from Mannino’s Bakery in Detroit.  She also brought Italian bread and real deal mediterranean olives and parmesan and Romano cheese from a speciality grocery store. I promise, I did make a few things—homemade meatballs, salad, and steamed green beans (I really like the French green beans from Costco, also great for feeding a crowd).  

I think we’re all more likely to host if we say yes when people ask to help.  Obviously, this doesn’t work when people are travelling on planes or super long distances, but when in-state friends asked if they could bring things, I said yes.  And it was a huge help to me—fresh fruit, even bottles of wine, snacks from Costco and Trader Joe’s (places that I can’t readily shop) were a great addition to the festivities.  

Side note: We’ve lived in a small town for the last seven years, and there are so many things that I love (living close to everything—school, work, friends, church—you really develop daily community in a way that is more challenging in a bigger city).  But, I do miss the Cleveland food scene.  Specialty grocery stores, bakeries and ethnic food that I took for granted, oh how I miss you!  

Homecoming weekend menu:

  • Friday dinner: Artisan cheeses, crackers, assorted olives, homemade lasagna, sauce, meatballs, green beans, Italian bread, Italian Cassata cake 

  • Saturday breakfast: Ham & veggie egg bake, fresh fruit, coffee and toast

  • Saturday lunch: A la carte—cold cut sandwiches and such

  • Saturday dinner:  Barbecued chicken, pulled pork, grilled hot dogs, assorted salads, baked beans, dips (one of my favorite easy go to dips is Costco’s prepared spinach artichoke dip) and a variety of potato and corn chips, salsa, etc…

When feeding a crowd, I often choose desserts that are plentiful and not overly complicated. As I’ve mentioned before, we’re nearly 90 minutes from the nearest bigger city (Ann Arbor is my go to) and so buying desserts is not a great option for me).  Thus, my friend carted a cassata cake all the way from Detroit for our Friday dinner! For Saturday evening, I had my mom make the Pioneer Woman’s chocolate sheet cake.  Everyone always loves a bit of chocolate, and this recipe feeds a crowd.  

PSA: Along with Ina Garten, the Pioneer Woman is one of my go to’s for recipes.  She cooks for a crowd, people always enjoy her recipes and they’re mostly fail proof!  Don’t believe me, check out Jennifer Garner’s#PretendCookingShow.  By the way, I want a pretend cooking show!  

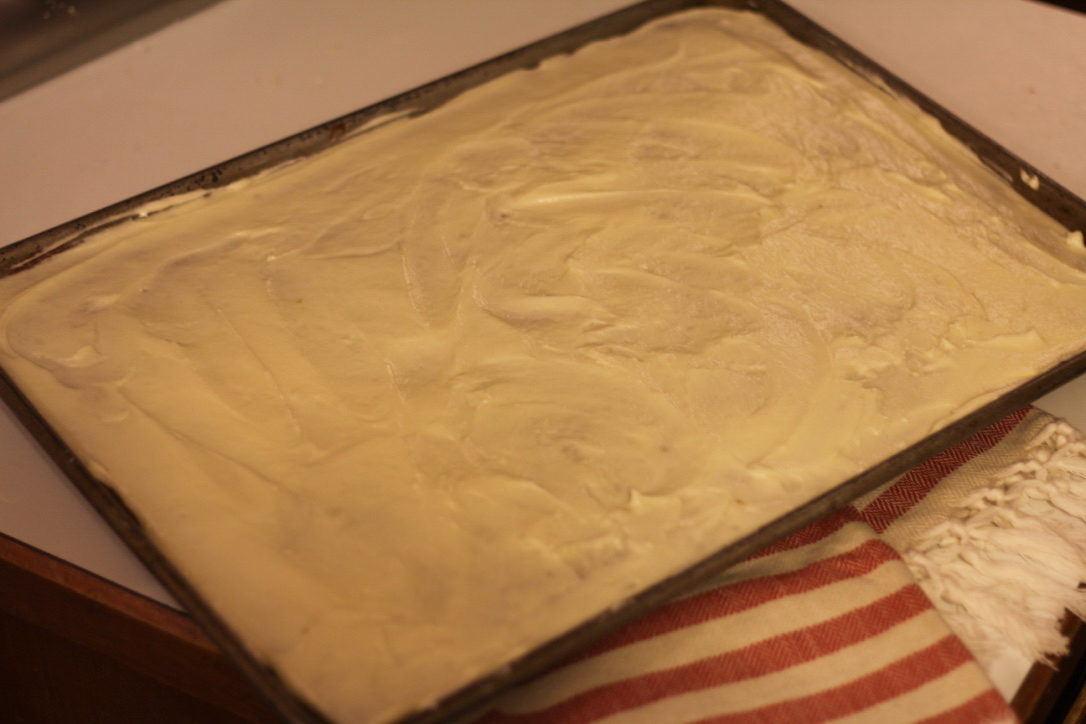
 A friend who lives in town brought these Pumpkin bars (seriously, I have made this recipe three times since last month).  Delicious and not labor intensive.  It reminds me of pumpkin roll, but easier.  No trying to gingerly remove from the pan, cool and roll.  Just fill pan with batter, bake, cool and frost!  

Pumpkin cake—I wish I had a better photo. I promise, it feeds a crowd and is delicious. Way better than the photo depicts.

Pumpkin cake—I wish I had a better photo. I promise, it feeds a crowd and is delicious. Way better than the photo depicts.

Pumpkin cake topped with cream cheese frosting.

Pumpkin cake topped with cream cheese frosting.

As October is quickly drawing to a close, holiday prep is on many of our minds.  From décor to menu planning to strategies for getting the house in order, it can seem like a daunting task.  I think it’s often so overwhelming many of us choose not to do it.  But my encouragement for today is that yes, it requires some extra work, but gathering friends and family over the years has been the most rewarding “work” I have ever done.  Don’t let your house or fear of feeding a crowd keep you from gathering people.  Memories and friendships really do begin around the table.  

Thanks again for Tree Classics for sponsoring this blog hop, Treasured Celebrations. Starting next Monday, October 29th, these other bloggers will be joining me, sharing their home decor and fall traditions: Emily of smallstuffcounts.com, Monday, October 29, Kathy of uptodateinteriors.com on Tuesday October 30th, Kendra of joyinourhome.com on Thursday, November 1st, and Kaitlyn of @freshandvintageliving | freshandvintageliving.com on Friday, November 2nd! And of course, I would love to hear about your fall gatherings and traditions!

Celebrating our 20th college reunion & 24 years of friendship! So thankful for these women and the rich heritage we have built.

Celebrating our 20th college reunion & 24 years of friendship! So thankful for these women and the rich heritage we have built.

Join us as tree classics kicks of the holiday season with our treasured celebrations blog hop! Each of us will be offering our design ideas for creating a welcoming fall home.

Join us as tree classics kicks of the holiday season with our treasured celebrations blog hop! Each of us will be offering our design ideas for creating a welcoming fall home.

Lutz Family DIY Advent Calendar Tradition

Lutz Family DIY Advent Calendar Tradition

Each December, like so many families around the globe, the Lutz family counts down the 25 days before Christmas with an Advent calendar.  For the past few years, we have added a fun twist to this beautiful tradition. Along with our conventional calendar with its daily verse and piece of candy for each child, we create an annual Advent calendar out of great Christmas books.

Read More